chemistry lab manual

Safety in the Chemistry Lab

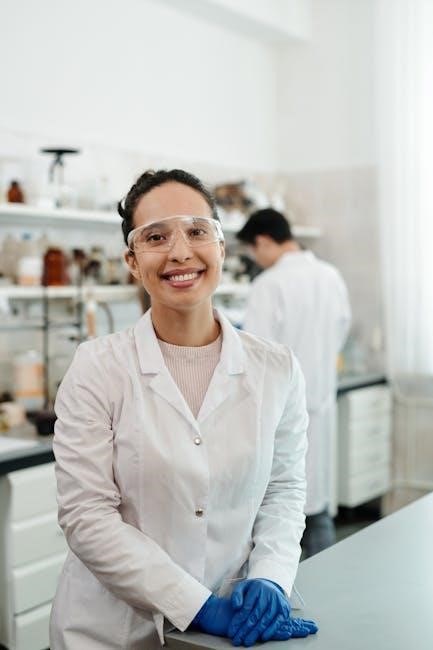
Safety is paramount in a chemistry lab. Always wear protective gear like gloves, goggles, and lab coats. Familiarize yourself with emergency exits and equipment like fire extinguishers. Proper ventilation is crucial to avoid inhaling harmful fumes. Handle chemicals carefully, reading labels and following procedures. Spills should be cleaned immediately, and waste disposed of correctly. Stay alert and follow all safety protocols to prevent accidents and ensure a secure environment for everyone.

1.1 Essential Safety Equipment and Procedures

In a chemistry lab, essential safety equipment includes lab coats, goggles, gloves, and closed-toe shoes to protect against chemicals and spills. Fire extinguishers, fume hoods, and emergency showers are critical for handling fires and exposure to hazardous substances. Proper ventilation ensures harmful vapors are removed. Before starting experiments, read chemical labels carefully and follow safety data sheets (SDS). Familiarize yourself with emergency exits and procedures for spills or accidents. Always handle chemicals in well-ventilated areas and avoid tasting or smelling substances. Regular safety drills and training are vital to ensure preparedness. Adhering to these procedures minimizes risks and creates a safe environment for everyone in the lab.

1.2 Handling Hazardous Chemicals and Emergency Protocols

Handling hazardous chemicals requires strict adherence to safety protocols. Always wear appropriate PPE, including gloves and goggles, when working with chemicals. Ensure proper storage and labeling of substances, following SDS guidelines. In case of spills, contain the area and use absorbent materials; never touch spilled chemicals without protection. For skin or eye exposure, flush with water and seek immediate medical help. Fire incidents should be addressed with fire extinguishers rated for chemical fires. Evacuate the lab and alert others in emergencies. Keep emergency contact information accessible and know the location of first aid kits and eyewash stations. Regular training on these protocols ensures preparedness and minimizes risks in the lab environment.

Pre-Lab Preparation

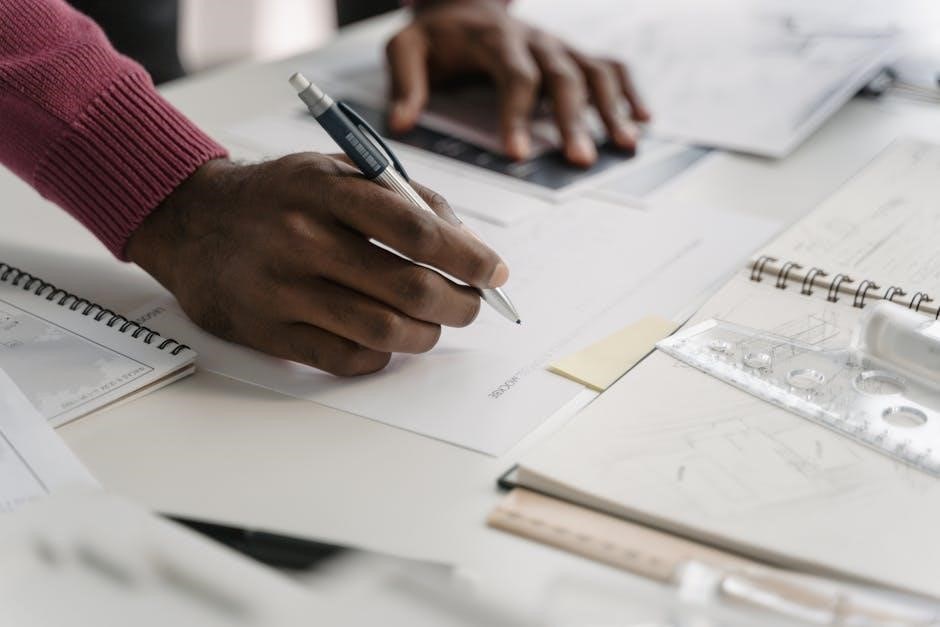
Pre-lab preparation involves reviewing the experiment’s objectives, gathering materials, and understanding procedures. Ensure proper attire, safety knowledge, and familiarity with equipment before starting the experiment.

2.1 Understanding the Experiment and Its Objectives

Understanding the experiment and its objectives is crucial for a successful lab session. Begin by thoroughly reading the lab manual to grasp the purpose, methods, and expected outcomes. Identify key concepts and any underlying scientific principles. Familiarize yourself with the materials and equipment required, ensuring you know their proper uses. Clarify any questions with your instructor to avoid confusion. This preparation helps you stay focused during the experiment, ensuring accurate results and a deeper understanding of the scientific process. A clear understanding of objectives also aids in analyzing data and drawing meaningful conclusions.

2.2 Gathering Materials and Equipment

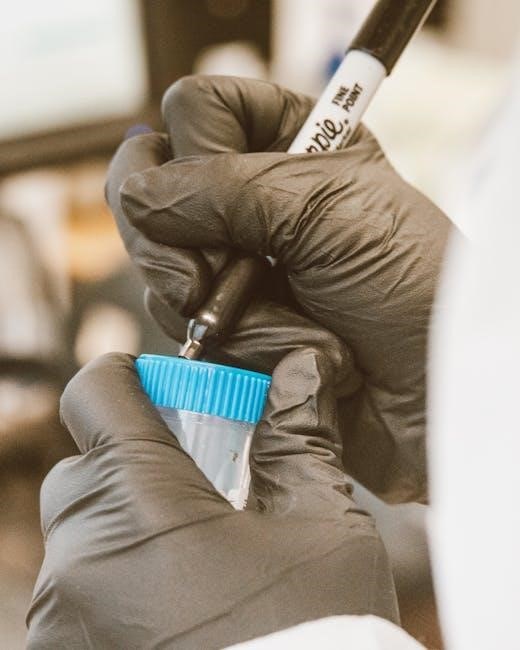
Gathering the right materials and equipment is essential for a smooth experiment. Begin by making a detailed list based on the lab manual. Organize all items, ensuring they are in good working condition. Check for any damaged or expired materials and replace them if necessary. Familiarize yourself with the equipment’s proper use to avoid errors. Measure or prepare chemicals as specified, using appropriate tools. Label everything clearly and store excess materials safely. Double-check the list before starting to ensure nothing is missing. This preparation minimizes delays and helps maintain focus during the experiment, allowing you to proceed efficiently and accurately.

Conducting the Experiment

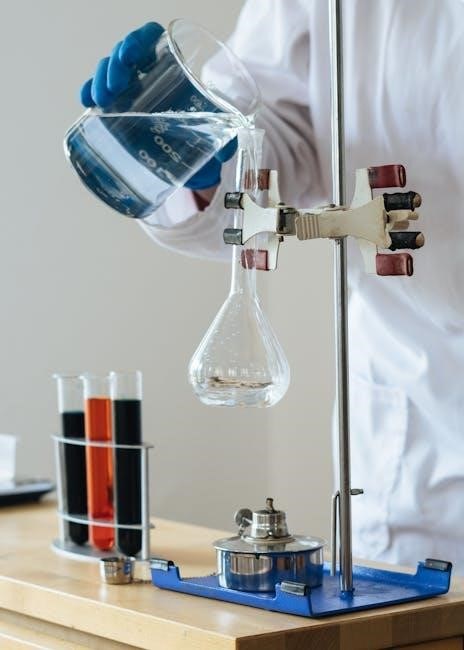
Conducting the experiment involves following detailed procedures, measuring accurately, and observing reactions carefully. Record data thoroughly and maintain a clean, organized workspace throughout the process.

3.1 Measurement Techniques and Accuracy

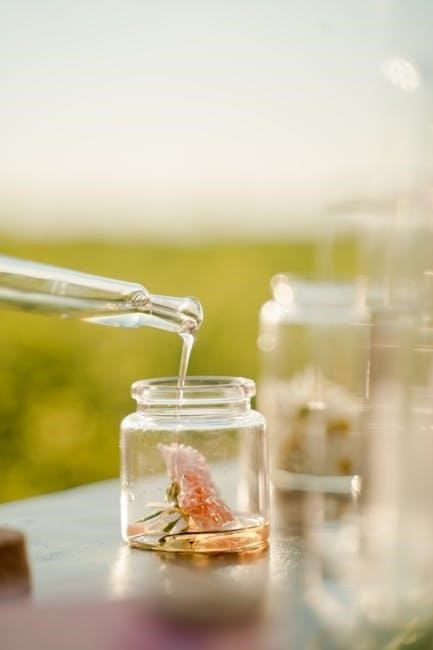
Accurate measurements are critical in chemistry experiments. Use calibrated tools like balances, burettes, and pipettes to ensure precision. Record data to the correct number of significant figures, avoiding rounding errors. For liquids, read measurements at eye level to maintain accuracy. Regularly calibrate equipment to prevent systematic errors. Always measure chemicals in their purest form to avoid contamination. Documenting precise measurements ensures reliable results and replicability of the experiment. Proper techniques minimize errors, leading to trustworthy data and valid conclusions. Consistency in measurement practices is essential for maintaining the integrity of the experiment.

3.2 Recording Observations and Data

Accurate and detailed recording of observations and data is essential in chemistry experiments. Use a lab notebook to document all findings, ensuring clarity and organization. Record both qualitative and quantitative data, noting colors, odors, textures, and any changes observed. Measurements should be precise, including units and significant figures. Sketch diagrams or graphs to visually represent trends or reactions. Avoid calculations in the observation section; reserve them for analysis. Ensure all entries are dated and initialed for accountability. Proper documentation allows for accurate analysis and reproducibility of the experiment. Consistent and thorough recording practices are fundamental to scientific integrity and reliable results.

Post-Lab Procedures

After completing the experiment, clean and store equipment properly. Dispose of chemicals according to safety guidelines and sanitize the workspace. Ensure all materials are restocked.

4.1 Cleaning Up and Disposing of Chemicals

Cleaning up and disposing of chemicals properly is essential for safety and environmental protection. Always follow the instructor’s guidelines for disposal. Avoid pouring chemicals down drains; use designated containers. Neutralize acids or bases before disposal. Use absorbent materials for spills and label waste correctly. Segregate hazardous and non-hazardous waste. Ensure all equipment is cleaned and stored properly; Dispose of broken glassware in marked containers. Wear gloves and goggles during cleanup. Double-check the lab area for any leftover materials. Proper disposal prevents contamination and ensures a safe environment for future experiments.

4.2 Analyzing Results and Drawing Conclusions

Analyzing results and drawing conclusions involves interpreting data to determine if the experiment achieved its objectives. Organize data clearly, using graphs or tables for better understanding. Avoid including raw, unprocessed data in the final report. Ensure calculations are accurate and logical. Compare findings with expected outcomes, discussing any discrepancies. Conclusions should summarize key results without introducing new data. Highlight limitations of the experiment and suggest potential areas for future study. This step ensures the experiment’s findings are meaningful and contribute to broader scientific understanding. Always relate conclusions back to the initial hypothesis to provide closure and clarity.

Lab Report Writing

A lab report clearly communicates the experiment’s purpose, methods, results, and conclusions. It ensures data is presented logically, supporting scientific understanding and future reference, while maintaining clarity and precision.

5.1 Structure and Format of a Lab Report

A well-structured lab report includes key sections: title, abstract, introduction, methods, results, discussion, and references. The title should be concise, reflecting the experiment’s purpose. The abstract provides a brief summary of the entire report. The introduction states the objective, relevant background, and hypotheses. Methods detail procedures, materials, and techniques. Results present data objectively, often using tables or graphs. The discussion interprets findings, links them to hypotheses, and discusses implications. Proper formatting includes clear headings, consistent font, and spacing. Use bullet points or numbered lists for procedures. Ensure clarity and conciseness, avoiding unnecessary details. Properly label tables, graphs, and appendices if included.

5.2 Presenting Data and Results Effectively

Presentation of data and results is critical for clear communication. Use tables, graphs, or charts to visually represent findings, ensuring they are labeled clearly and accurately. Avoid clutter; focus on highlighting trends or patterns. Raw data should be organized and concise, while processed data should be interpreted in the context of the experiment. Use bullet points or numbered lists for clarity. Ensure all visual aids are properly captioned and referenced in the text. Avoid unnecessary details and maintain consistency in formatting. Proper presentation enhances readability and helps draw meaningful conclusions from the data. Accuracy and precision are key to conveying reliable results effectively.

Advanced Lab Techniques

Advanced techniques involve specialized equipment like chromatography and spectroscopy. Mastering methods such as titration, distillation, and electrolysis enhances precision. Proper training and practice ensure accurate and reliable results.

6.1 Specialized Equipment and Their Uses

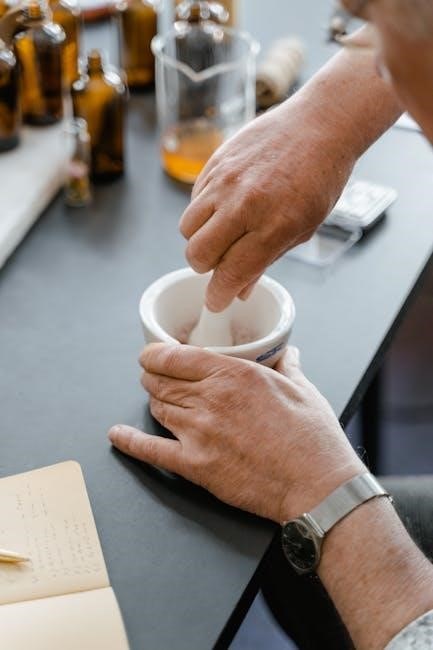
In advanced lab settings, specialized equipment is essential for precise experiments. Spectrophotometers measure light absorption, crucial for analyzing concentrations. Chromatography columns separate chemical mixtures based on molecular properties. Distillation setups purify substances by boiling and condensing. Electrolysis equipment splits compounds using electric currents, while centrifuges separate solids from liquids. Each tool is designed for specific tasks, ensuring accurate and efficient results. Understanding their functions and proper usage is vital for conducting complex experiments safely and effectively. Regular maintenance and calibration of these instruments are necessary to uphold experimental integrity and reliability.

6.2 Troubleshooting Common Lab Errors

Identifying and addressing lab errors is crucial for accurate results. Common issues include inaccurate measurements, incorrect reagent ratios, and equipment malfunctions. To troubleshoot, review procedures, double-check calculations, and ensure proper equipment calibration. Contamination can skew results, so maintaining sterile conditions is key. If unexpected observations occur, reassess experimental steps and consider alternative methods. Documenting errors and solutions helps refine techniques and improves future outcomes. Effective problem-solving enhances the reliability and reproducibility of experiments, fostering a better understanding of chemical principles and their practical applications in a controlled environment.

Continuous Improvement in Lab Work

Reflect on lab performance, identify areas for growth, and apply feedback to enhance skills. Document progress, stay updated on new techniques, and maintain organization for efficiency and accuracy.

7.1 Reflecting on Lab Performance

Reflecting on lab performance involves analyzing strengths and areas for improvement. Consider what worked well and what didn’t, focusing on accuracy, safety, and efficiency. Review data and observations to identify patterns or errors. Seek feedback from instructors or peers to gain new insights. Use this reflection to adjust techniques, improve problem-solving, and ensure adherence to safety protocols. Regular self-assessment fosters growth, enhances critical thinking, and prepares you for more complex experiments. By learning from each session, you refine your skills and contribute to a safer, more productive lab environment.

7.2 Implementing Feedback for Better Outcomes

Implementing feedback is crucial for improving lab performance and achieving better results. After receiving feedback, review it carefully to identify areas needing adjustment. Use specific suggestions to refine techniques, improve accuracy, and enhance safety. Practice revised methods in subsequent experiments, ensuring adherence to proper protocols. Regularly seek input from instructors or peers to track progress and address persistent challenges. By applying feedback systematically, you can overcome limitations, strengthen problem-solving skills, and produce more reliable data. Continuous improvement fosters confidence and competence, leading to successful and efficient lab work.

study guide romeo and juliet answers

A comprehensive study guide for Romeo and Juliet‚ offering detailed questions‚ answers‚ and analysis. It covers plot‚ characters‚ themes‚ and language‚ helping students grasp the play’s enduring significance and universal themes.

1.1 Overview of the Play and Its Significance

Romeo and Juliet‚ a tragic love story by William Shakespeare‚ revolves around the feud between the Montagues and Capulets in Verona. The play explores themes of love vs. hate‚ fate vs. free will‚ and loyalty‚ culminating in the heartbreaking ending of the two lovers. Its significance lies in its timeless appeal‚ making it a cornerstone of literature and a continuous source of adaptation and inspiration. The play’s universal themes of love‚ conflict‚ and tragedy resonate across cultures‚ ensuring its enduring relevance in modern times.

1.2 Importance of Study Guides for Understanding the Play

Study guides are invaluable tools for unpacking the complexities of Romeo and Juliet. They provide structured questions‚ answers‚ and analyses‚ helping students grasp key themes‚ characters‚ and plot points. Guides also highlight Shakespeare’s language and dramatic techniques‚ making the play more accessible. By breaking down the text‚ they enable deeper understanding and critical thinking‚ ensuring students are well-prepared for exams‚ essays‚ and discussions. These resources are essential for connecting with the play’s timeless themes and literary brilliance.

Major Themes in Romeo and Juliet

The play explores themes of love vs. hate‚ fate vs; free will‚ loyalty‚ betrayal‚ and the clash between youthful passion and societal expectations.

2.1 Love vs. Hate: The Central Conflict

The central conflict of Romeo and Juliet revolves around the intense struggle between love and hate‚ driving the plot and character actions. Romeo and Juliet’s passionate love contrasts sharply with the deep-seated hatred between their families‚ the Montagues and Capulets. This duality fuels tragic events‚ as seen in Tybalt’s hatred for Romeo and the lovers’ ultimate sacrifice. The play explores how love unites while hate destroys‚ highlighting the destructive power of unchecked animosity and the redemptive potential of love‚ though it ends in heartbreak and loss.

2.2 Fate vs. Free Will: The Tragic Ending

In Romeo and Juliet‚ fate and free will intertwine to shape the tragic outcome. The chorus often suggests a predetermined course‚ while the characters’ choices‚ like Romeo’s impulsive decisions and Juliet’s defiance‚ drive the plot. Their ultimate deaths symbolize the devastating collision of fate and personal actions‚ leaving the audience reflecting on whether their destiny was sealed or self-determined‚ illustrating how even with free will‚ fate’s influence can lead to heartbreaking consequences.

2.3 Loyalty and Betrayal: Family and Relationships

Loyalty and betrayal are central to the tragic dynamics of Romeo and Juliet. The feud between Montagues and Capulets demands unwavering loyalty‚ yet Romeo and Juliet’s secret marriage betrays their families’ hatred. Characters like Friar Laurence‚ Mercutio‚ and the Nurse exhibit loyalty‚ while their actions inadvertently lead to betrayal. These conflicting forces drive the play’s emotional depth‚ highlighting how loyalty to love and family can lead to devastating consequences‚ ultimately fueling the tragic conclusion.

Key Characters and Their Roles

Romeo and Juliet are star-crossed lovers whose tragic fate drives the play. Supporting characters like Friar Laurence‚ Mercutio‚ and the Nurse influence their journey‚ shaping the story’s outcome.

3.1 Romeo Montague: His Personality and Development

Romeo‚ a Montague‚ evolves from a lovesick romantic to a determined‚ passionate lover. His impulsive nature and deep emotions lead to pivotal decisions‚ showcasing his growth and tragic downfall.

3.2 Juliet Capulet: Her Growth and Decision-Making

Juliet evolves from an innocent‚ obedient daughter to a determined‚ independent individual. Her pivotal decisions‚ such as defying her parents and faking her death‚ highlight her growth and bravery. Despite her youth‚ Juliet’s choices reflect a deep understanding of love and sacrifice‚ showcasing her transformation into a strong-willed and tragic heroine.

3.3 Supporting Characters: Friar Laurence‚ Mercutio‚ and the Nurse

Friar Laurence‚ Mercutio‚ and the Nurse play crucial roles in shaping the plot and characters. Friar Laurence‚ as a wise mentor‚ devises plans to unite Romeo and Juliet‚ while Mercutio’s wit and loyalty provide comic relief and highlight Romeo’s emotional depth. The Nurse‚ Juliet’s confidante‚ offers maternal support but ultimately betrays her trust‚ contributing to the tragic outcome. Each character’s distinct personality influences the protagonists’ decisions and the play’s progression.

Language and Style in Romeo and Juliet

Shakespeare’s rich imagery and metaphors‚ such as Juliet as the sun‚ enhance emotional depth. Dramatic irony‚ like Romeo’s hidden poison‚ builds suspense and audience engagement.

4.1 Shakespeare’s Use of Imagery and Metaphors

Shakespeare’s vivid imagery and metaphors enrich the play‚ creating powerful visualizations. For instance‚ Juliet is compared to the sun‚ emphasizing her radiant beauty and Romeo’s adoration. Such linguistic devices enhance emotional depth and thematic resonance‚ making the text more engaging and memorable for readers and audiences alike.

4.2 Dramatic Irony and Its Impact on the Audience

Dramatic irony in Romeo and Juliet heightens tension and engages audiences by revealing information characters are unaware of. For example‚ Juliet’s fake death is known to the audience but not to Romeo‚ creating suspense and emotional anguish. This technique amplifies the play’s tragic impact‚ as viewers anticipate the inevitable consequences‚ deepening their connection to the characters’ plight and the narrative’s emotional weight.

Study Guide Questions and Answers

This section provides a detailed exploration of Romeo and Juliet through targeted questions and answers. It helps students engage with the play‚ analyze key themes‚ and prepare for assessments by addressing plot points‚ character motivations‚ and symbolic elements.

5.1 Comprehension Questions: Plot and Characters

This section includes questions to test understanding of the play’s plot and characters. For example‚ “What does the prologue reveal about the fate of the two lovers?” or “How does Romeo’s behavior change after meeting Juliet?” Additional questions explore key events‚ such as the fight between Tybalt and Mercutio‚ and Juliet’s decision to fake her death. These questions help students track character development and plot progression‚ ensuring a solid grasp of the narrative.

5.2 Analysis Questions: Themes and Symbolism

This section delves into the exploration of Romeo and Juliet’s themes‚ such as love vs. hate‚ fate‚ and loyalty. Questions like “How does Shakespeare use light and darkness to symbolize the lovers’ relationship?” or “What role does fate play in the tragic ending?” encourage deeper analysis. Additionally‚ inquiries about symbols like the apothecary’s potion or the balcony explore their significance in conveying themes. These questions help students interpret the play’s layered meanings and artistic choices.

5.3 Essay Topics: Exploring Deeper Meanings

Essay topics encourage critical analysis of Romeo and Juliet’s themes and symbolism. Questions like “How does Shakespeare portray the consequences of impulsive decisions?” or “What role do societal conflicts play in the lovers’ tragedy?” prompt students to explore deeper meanings. Topics also include analyzing the symbolism of settings like the balcony or tomb‚ and the representation of love as both redemptive and destructive. These essays foster a nuanced understanding of Shakespeare’s exploration of human nature and conflict.

Why Romeo and Juliet is Still Relevant Today

Romeo and Juliet remains relevant due to its universal themes of love‚ hate‚ and family conflict‚ resonating across cultures and time‚ influencing modern literature and media.

6.1 Universal Themes and Modern Connections

Romeo and Juliet’s themes of love‚ hate‚ and fate transcend time‚ connecting with modern audiences. Teenagers relate to Romeo’s emotional struggles and impulsive decisions‚ while families see reflections of their own conflicts. The play’s exploration of loyalty‚ betrayal‚ and sacrifice resonates universally‚ making it a timeless classic. Its influence is evident in literature‚ film‚ and music‚ ensuring its relevance in contemporary culture and education.

6.2 The Play’s Influence on Literature and Media

Romeo and Juliet’s profound influence on literature and media is undeniable. It has inspired countless adaptations‚ from ballets to films‚ and shaped modern storytelling. Authors and filmmakers often draw parallels to its tragic love story‚ while its characters and dialogues have become cultural references. The play’s impact extends to music‚ with lyrics reflecting its themes‚ ensuring its legacy endures across diverse artistic platforms and genres‚ making it a cornerstone of creative expression and inspiration.

Answer Key for Study Guide Questions

This section provides clear solutions to common study guide queries‚ offering detailed explanations for plot‚ character‚ and theme-related questions. It ensures a thorough understanding of the play.

7.1 Solutions to Common Study Guide Queries

This section offers detailed answers to frequently asked questions about Romeo and Juliet‚ covering plot points‚ character motivations‚ and thematic elements. It clarifies key scenes‚ such as why Romeo and Juliet are called “star-cross’d lovers” and the significance of Mercutio’s role. Additionally‚ it provides insights into pivotal moments like the balcony scene and the tragic ending‚ ensuring a deeper understanding of Shakespeare’s masterpiece and its universal themes.

7.2 Clarifications on Difficult Scenes and Lines

This section breaks down complex scenes and lines‚ offering clear explanations. For instance‚ Mercutio’s death in Act 3‚ Juliet’s potion decision‚ and Romeo’s impulsive actions are analyzed. Difficult lines‚ such as the balcony soliloquy‚ are interpreted to reveal character emotions and motivations. Additionally‚ the final tomb scene is explored‚ highlighting the tragic consequences of impulsive decisions and the enduring message of love vs. hate‚ ensuring a clearer understanding of Shakespeare’s nuanced storytelling.

juice from the raw instructions

Raw juice, made from unpasteurized fruits and vegetables, retains natural enzymes and nutrients. Cold-pressed methods preserve freshness, offering a healthy, plant-based option for modern lifestyles.

Understanding the Concept of Raw Juice

Raw juice is extracted from fresh, unprocessed fruits, vegetables, and greens without cooking or pasteurization. It retains natural enzymes, vitamins, and minerals, offering a nutrient-dense beverage. Cold-pressing is a common method used to preserve freshness and flavor, ensuring maximum health benefits. Raw juice is a popular choice for health-conscious individuals seeking a natural way to nourish their bodies.

Benefits of Consuming Raw, Unpasteurized Juices

Raw, unpasteurized juices are rich in enzymes, vitamins, and minerals, boosting digestion and immunity. They aid in detoxification, improve energy levels, and support overall well-being. Cold-pressed juices are particularly beneficial, as they retain more nutrients compared to traditional methods, making them a healthy choice for those seeking a natural way to enhance their diet and lifestyle.

Health Benefits of Raw Juices

Raw juices enhance digestion, improve nutrient absorption, and support detoxification. They boost energy levels, promote healthy skin, and aid in maintaining overall well-being naturally.

Improving Digestive Health with Raw Juices

Raw juices, rich in natural enzymes, aid digestion by breaking down proteins and reducing bloating. Ingredients like papaya, with papain, relieve constipation and cleanse the digestive system. Cold-pressing preserves nutrients, supporting gut health and promoting a balanced digestive function naturally.

How Raw Beetroot Juice Lowers Blood Pressure

Raw beetroot juice is rich in nitrates, which convert to nitric oxide in the body. This relaxes blood vessels, improving circulation and lowering blood pressure. Regular consumption supports cardiovascular health and reduces the risk of heart-related issues naturally.

Popular Raw Juice Ingredients

Raw beetroot juice contains nitrates, which the body converts into nitric oxide. This compound relaxes blood vessels, improving circulation and lowering blood pressure naturally. Regular consumption supports cardiovascular health and reduces the risk of heart-related issues without the need for medication, offering a natural and effective solution.

The Nutritional Power of Beetroot in Juices

Beetroot is a nutrient-rich ingredient, packed with vitamins A and C, fiber, potassium, and antioxidants. Its deep red color adds natural sweetness and earthy flavor to juices. Beetroot supports immune function, detoxifies the liver, and boosts energy levels. It is also high in nitrates, which improve blood flow and lower blood pressure, making it a popular choice for health-conscious juicing.

Using Papaya for Digestive Health and Cooling Effects

Papaya is rich in papain, an enzyme that aids protein digestion, reducing bloating and indigestion. Its cooling properties lower internal heat, making it ideal for summer juices. High in vitamins A and C, and potassium, papaya supports immune function and skin health, while its anti-inflammatory properties promote overall well-being, enhancing raw juice benefits naturally.

Raw Juice Preparation Methods

Cold-pressing preserves nutrients and enzymes, while homemade methods like blending fruits and straining offer fresh, unprocessed juice without special equipment, catering to various preferences and needs.

Cold-Pressing: The Healthiest Way to Extract Juice

Cold-pressing uses a hydraulic press to extract juice without heat, preserving up to 5x more nutrients and enzymes than traditional methods. This slow process ensures freshness, retains vibrant colors, and delivers a more flavorful experience, making it ideal for health-conscious individuals seeking maximum nutritional benefits from raw ingredients.

Homemade Raw Grape Juice Without a Juicer

Make raw grape juice at home by blending grapes with water, then straining through a cheesecloth or fine-mesh sieve. This method avoids heat and preserves enzymes, offering a fresh, nutrient-rich drink. Add optional ingredients like lemon juice for flavor. Perfect for those without juicers, ensuring a healthy and delicious beverage any time.

Raw Juice and Diet Trends

Raw juice is a popular choice in modern diet trends, particularly for detox cleanses and vegan lifestyles. Its demand grows as people seek organic, cold-pressed options for wellness.

Raw Veganism and Its Connection to Juice Diets

Raw veganism emphasizes uncooked plant-based foods, aligning perfectly with juice diets. Juices made from fresh, organic ingredients provide essential nutrients and enzymes, supporting detox and overall wellness. Many raw vegans opt for cold-pressed juices as a convenient way to incorporate nutrient-dense foods into their lifestyle, promoting energy and vitality without compromising on taste or health benefits.

Detox Cleanses with Raw, Organic Ingredients

Detox cleanses using raw, organic ingredients promote overall wellness by flushing toxins. Cold-pressed juices, rich in vitamins and minerals, support digestion and boost immunity. These cleanses often feature combinations like green vegetables and fruits, helping reset the body naturally. They are popular for their convenience and effectiveness in enhancing energy and mental clarity without harsh chemicals or processed foods.

Raw Juice in Modern Lifestyle

Raw juice is a popular choice for modern health-conscious individuals, offering a convenient way to incorporate nutrient-rich, plant-based beverages into busy lifestyles, promoting overall well-being.

Fueling Healthy Lifestyles with Plant-Based Juices

Plant-based juices are a vibrant way to fuel modern lifestyles, offering nutrient-dense, easy-to-consume options. They provide essential vitamins, minerals, and enzymes, supporting energy and immunity. With options like cold-pressed greens and tropical blends, these juices cater to diverse tastes and dietary needs, making healthy living accessible and delicious for everyone.

Whether for breakfast, post-workout, or a quick snack, raw juices fit seamlessly into busy routines. Their natural goodness aligns with the growing demand for clean, sustainable nutrition, making them a staple in health-conscious communities worldwide.

Refreshing Summer Drinks: Raw Melon and Tropical Juices

Raw melon and tropical juices are perfect for hot summer days, offering refreshing hydration packed with vitamins and antioxidants. Watermelon, cantaloupe, mango, and pineapple juices provide natural sweetness and cooling effects. They help beat the heat while delivering essential nutrients, making them ideal for outdoor activities or relaxing at home. These vibrant drinks are a healthy way to stay refreshed and energized all season long.

Commercial Availability of Raw Juices

Brands like Raw Pressery and Pure Raw Juice offer cold-pressed, organic juices online. These brands provide convenient delivery services, making raw juices easily accessible to health-conscious consumers nationwide.

Raw Pressery: A Leading Brand in Cold-Pressed Juices

Raw Pressery is a prominent brand offering cold-pressed juices rich in nutrients. Their range includes Coconut Water, Alphonso Mango, and Choco Mint Protein, ensuring high-quality, fresh products. Juices like Valencia Orange and Mixed Fruit are packed with Vitamin C, making them popular choices. Available online, Raw Pressery provides convenient delivery, catering to health-conscious individuals seeking organic, unpasteurized options for a vibrant lifestyle.

Other Popular Brands and Their Offerings

Brands like Pure Raw Juice and Raw Juce offer diverse plant-based menus, including cold-pressed juices, smoothies, and bowls. They provide options like Pink Melonade and Raw Lift, rich in seasonal fruits and greens. These brands emphasize local sourcing and organic ingredients, catering to vegan and gluten-free diets with nutrient-packed offerings, perfect for refreshing summer drinks and detox cleanses.

Raw Juice and Taste Preferences

Raw juices offer diverse flavor profiles, from sweet beetroot to tangy grapefruit, catering to varied taste preferences while providing refreshing and nutrient-rich options for all palates.

Exploring Flavor Combinations in Raw Juices

Raw juices offer unique and refreshing flavor combinations, such as Pink Melonade, blending pressed apples, guava, and passion fruit. These recipes create vibrant, nutrient-rich drinks that cater to diverse tastes, making raw juices a versatile choice for health-conscious individuals seeking delicious and innovative beverages.

Sweet and Tangy: The Appeal of Grapefruit Juice

Grapefruit juice combines a sweet and tangy flavor profile, making it a refreshing choice. Rich in Vitamin C, it supports immunity and metabolism. Cold-pressed grapefruit juice, like Raw Pressery’s offering, retains natural enzymes, providing a healthy and revitalizing drink option that’s perfect for kickstarting mornings or enhancing wellness routines.

Raw Juice for Specific Dietary Needs

Raw juices cater to various dietary needs, offering vegan and gluten-free options. They provide essential nutrients while adhering to specific preferences, ensuring a healthy and inclusive choice.

Vegan and Gluten-Free Options in Raw Juices

Raw juices offer vegan and gluten-free options, catering to diverse dietary needs. Cold-pressed methods ensure nutrient retention, making them ideal for those seeking plant-based, allergen-friendly alternatives. Popular brands provide certified gluten-free and vegan juices, ensuring accessibility for individuals with specific preferences or restrictions, while maintaining high nutritional value and fresh flavor profiles.

Raw Juices for Kids: A Healthy Alternative

Raw juices provide a nutritious, kid-friendly alternative to sugary drinks. Made from fresh fruits and vegetables, they offer essential vitamins and minerals. Brands like Raw Generation cater to children’s nutrition with real fruits and vegetables, making healthy choices fun and accessible for picky eaters while promoting overall wellness and development.

Cost and Accessibility of Raw Juices

Raw juices vary in price, with options like Raw Pressery offering affordable choices. Online delivery services and subscription models make them accessible, catering to diverse budgets and preferences.

Affordable Options for Raw Juice Enthusiasts

Brands like Pure Raw Juice and Raw Pressery offer budget-friendly options, including cold-pressed juices and smoothies. Online delivery services and subscription plans make raw juices more accessible, ensuring healthy choices fit various budgets. Many outlets provide smaller portions or starter kits, catering to newcomers and enthusiasts alike without compromising quality or nutrition.

  • Cold-pressed juices starting at affordable prices.
  • Subscription models for regular consumption.
  • Smaller portions for cost-effective trials.

Online Availability and Delivery Services

Brands like Raw Pressery and Pure Raw Juice offer convenient online ordering and delivery services. Their websites and apps provide easy access to a variety of cold-pressed juices, ensuring fresh products reach customers nationwide. Subscription plans and discounts further enhance affordability, making raw juices accessible to a broader audience seeking healthy lifestyle options;

  • Nationwide delivery services for raw juices.
  • Subscription plans for regular deliveries.
  • Discounts and promotions available online.

The Future of Raw Juice Industry

The raw juice industry is evolving with innovative products, sustainable practices, and expanding distribution. Trends include personalized blends, functional juices, and eco-friendly packaging, meeting growing consumer demand for healthy, natural beverages.

Trends in Raw Juice Production and Consumption

The raw juice industry is witnessing a surge in demand for organic, functional, and cold-pressed varieties. Consumers increasingly favor eco-friendly packaging and sustainable sourcing. Brands are innovating with unique flavor blends and subscription models, while emphasizing health benefits like detoxification and immune support. The rise of vegan and gluten-free options is also reshaping market preferences, catering to diverse dietary needs and preferences.

Innovative Products and Flavors Emerging in the Market

Innovative raw juice products now include probiotic-infused blends and functional juices targeting specific health benefits. Exotic flavors like turmeric-ginger and melon-mint are gaining popularity. Brands are also introducing kid-friendly options with hidden veggies and sweeter tastes. Additionally, the rise of customisable juices allows consumers to tailor blends to their preferences, enhancing personalisation and appeal in the market.

polycom vvx 411 manual

Overview of the Polycom VVX 411 Phone

The Polycom VVX 411 is a high-performance business media phone designed for efficient office communication. It features HD voice clarity‚ a 3.5-inch color display‚ and an ergonomic design‚ making it ideal for both basic and advanced user needs. With seamless integration with platforms like Skype for Business and intuitive controls‚ it enhances workplace productivity and collaboration.

1.1 Key Features and Benefits

The Polycom VVX 411 offers HD voice quality for crystal-clear calls‚ a 3.5-inch color display for easy navigation‚ and seamless integration with Skype for Business. It features Bluetooth connectivity‚ ergonomic design‚ and SIP support. Key benefits include call forwarding‚ transfer‚ and conferencing‚ plus customizable settings to enhance productivity and collaboration in office environments.

1.2 Target Audience and Use Cases

The Polycom VVX 411 is ideal for office workers requiring reliable communication tools. It suits small to medium-sized businesses‚ remote teams‚ and mobile workers needing Bluetooth connectivity. Use cases include desk-based calling‚ conferencing‚ and integration with productivity platforms like Skype for Business‚ making it perfect for collaborative and fast-paced work environments.

Hardware and Design

The Polycom VVX 411 features a sleek‚ durable design with a high-resolution 3.5-inch color display and an ergonomic interface. Built for reliability‚ it combines robust hardware with intuitive controls.

2.1 Physical Description and Build Quality

The Polycom VVX 411 boasts a compact‚ lightweight design with a 3.5-inch color LCD display and an intuitive interface. Built with durable materials‚ it ensures long-term reliability. The phone features a USB port for peripherals and an ergonomic layout for comfort. Its sturdy construction and high-resolution display make it suitable for office environments‚ blending functionality with a modern aesthetic.

2.2 Display and User Interface

The Polycom VVX 411 features a 3.5-inch color LCD display with a backlit touchscreen interface‚ ensuring vibrant visuals and intuitive navigation. The user-friendly design includes a touch-sensitive interface for easy access to call handling‚ directories‚ and settings. The display supports HD graphics‚ making it easy to read and interact with menus‚ call information‚ and multimedia content‚ enhancing the overall user experience and workplace efficiency.

Installation and Setup

The Polycom VVX 411 is easy to install and set up‚ requiring only a power connection and network link. It arrives pre-configured for seamless deployment.

3.1 Unboxing and Physical Installation

Unboxing the Polycom VVX 411 reveals the phone‚ power adapter‚ Ethernet cable‚ and optional devices like a handset. Physical installation involves connecting the power cable to the adapter and the Ethernet cable to your network. Mounting the phone on a desk or wall is straightforward using the provided stand or wall-mount kit.

3.2 Connecting to Power and Network

Connect the Polycom VVX 411 to power using the provided adapter. Plug one end into the phone’s power port and the other into a power outlet. For network connectivity‚ use the Ethernet cable to link the phone to your router or switch. Ensure both ends are securely connected. The phone supports Power over Ethernet (PoE) for convenient installation. Once connected‚ the phone will automatically detect network settings.

Configuration and Customization

The Polycom VVX 411 allows easy configuration of SIP accounts and network settings via its intuitive menu. Users can customize phone settings‚ including display options and audio preferences‚ to suit their needs.

4.1 Setting Up SIP Accounts and Network Settings

To configure the Polycom VVX 411‚ access the phone’s menu and navigate to Settings > SIP Accounts. Enter your SIP credentials‚ including the server address‚ username‚ and password. Ensure the network settings‚ such as DHCP or static IP configuration‚ are correctly set up for optimal connectivity. The phone supports advanced options like SIP encryption for secure communication. Refer to the manual for detailed steps on configuring these settings properly.

4.2 Customizing Phone Settings and Preferences

The Polycom VVX 411 allows users to tailor their experience through the Settings menu. Customize ring tones‚ display settings‚ and user preferences to suit individual needs. The phone also supports customization of call handling rules and personalization of the home screen layout. Advanced customization options‚ such as modifying network settings‚ can be accessed via the web interface for enhanced control and flexibility.

Using the Phone for Calls

The Polycom VVX 411 enables seamless call management. Users can place calls directly from the keypad or via the address book. The phone supports call hold‚ transfer‚ and conferencing‚ ensuring efficient communication. The intuitive interface allows easy navigation during active calls‚ with features like call forwarding and mute readily accessible.

5.1 Making and Receiving Calls

Making calls on the Polycom VVX 411 is straightforward. Users can dial numbers directly using the keypad or access contacts from the phone directory; For receiving calls‚ the phone features visual alerts and customizable ringtones. The screen flashes bright orange to indicate an incoming call‚ ensuring users never miss important communications. Call management options like hold and mute are easily accessible during active calls.

5.2 Call Management Features (Hold‚ Transfer‚ Conference)

The Polycom VVX 411 offers robust call management features. To place a call on hold‚ press the Hold button‚ allowing you to resume the call later. Call transfer can be initiated by pressing Transfer‚ entering the recipient’s number‚ and confirming. For conferencing‚ press Conference during an active call‚ add participants‚ and merge calls. These features streamline communication and enhance collaboration‚ ensuring efficient call handling.

Advanced Features and Functionality

The Polycom VVX 411 includes advanced features like voicemail‚ call forwarding‚ and integration with platforms such as Skype for Business‚ enhancing communication and productivity for users.

6.1 Voicemail and Call Forwarding

The Polycom VVX 411 supports advanced voicemail and call forwarding features. Users can easily set up and manage voicemail directly through the phone’s interface‚ with options for remote access. Call forwarding allows seamless redirection of calls to alternate numbers or voicemail‚ ensuring no missed communications. These features enhance flexibility and productivity for users in various work environments.

6.2 Integration with Skype for Business and Other Platforms

The Polycom VVX 411 seamlessly integrates with Skype for Business‚ enabling enhanced collaboration and communication. It supports presence status‚ instant messaging‚ and call management directly from the Skype interface. Additionally‚ the phone can connect with other platforms‚ ensuring compatibility and flexibility for diverse workplace environments. This integration streamlines workflows‚ improving productivity and user experience across various collaboration tools.

Troubleshooting Common Issues

Troubleshooting the Polycom VVX 411 involves diagnosing connectivity problems‚ resolving audio issues‚ and addressing display malfunctions. Resetting the phone or checking network settings often resolves common glitches.

7.1 Diagnosing and Resolving Connectivity Problems

To diagnose connectivity issues with the Polycom VVX 411‚ start by checking the physical connections of network and power cables. Ensure the phone is properly connected to a functioning network port. If issues persist‚ verify IP settings‚ subnet masks‚ and gateways through the phone’s web interface. Restarting the device or performing a factory reset can often resolve connectivity problems. For advanced troubleshooting‚ use diagnostic tools provided in the phone’s settings or consult the user manual for detailed guidance.

7.2 Addressing Audio and Display Issues

For audio issues‚ ensure the speaker or headset is properly connected and configured. If the display flickers or shows incorrect colors‚ restart the phone or adjust brightness settings. Muffled sound can be resolved by checking volume levels or disabling noise cancellation. If problems persist‚ reset the phone to factory settings or update the firmware via the web interface for optimal performance.

Maintenance and Updates

Regularly update the firmware and software to ensure optimal performance and security. Perform routine checks on cables and connections to maintain functionality and prevent issues.

8.1 Updating Firmware and Software

Regular firmware and software updates ensure the Polycom VVX 411 phone operates with the latest features and security patches. To update‚ access the phone’s web interface‚ check for available updates‚ and download the latest version from Polycom’s official website. Follow on-screen instructions to install the update and reboot the device to complete the process.

  • Always use authorized sources for updates.
  • Backup settings before performing updates.

8.2 Performing Routine Maintenance Tasks

Routine maintenance ensures optimal performance of the Polycom VVX 411 phone. Regularly clean the display with a soft cloth and check for dust in ports. Restart the device periodically to clear cached data. Ensure the firmware is up-to-date and perform system checks via the web interface to identify potential issues early.

  • Clean the phone and its components regularly.
  • Check for firmware updates and install them.
  • Restart the phone periodically for optimal performance.

Security and Privacy

The Polycom VVX 411 ensures secure communication with SRTP and TLS encryption. It supports secure boot and role-based access control to protect against unauthorized access and data breaches.

9.1 Securing the Phone and Network Connection

The Polycom VVX 411 ensures secure communication with SRTP and TLS encryption. It supports secure boot‚ HTTPS‚ and role-based access control to prevent unauthorized access. The phone also features secure firmware updates and robust network security protocols to safeguard against data breaches and maintain privacy.

9.2 Managing User Authentication and Access

The Polycom VVX 411 supports secure user authentication through PIN or password protection‚ ensuring only authorized users can access settings. Role-based access control allows administrators to restrict features based on user roles. The phone also supports multi-user profiles‚ enabling personalized settings while maintaining system security. Regular firmware updates further enhance security by patching vulnerabilities and protecting user credentials.

Resources and Support

The Polycom VVX 411 offers extensive resources‚ including a detailed user manual‚ troubleshooting guides‚ and access to technical support. Users can also engage with community forums for additional assistance.

10.1 Accessing the Full User Guide and Manuals

The Polycom VVX 411 manual is available in PDF format on the official Polycom website and select third-party support platforms. Users can download the comprehensive guide‚ which covers installation‚ configuration‚ and troubleshooting. Additional resources‚ such as quick start guides and troubleshooting documents‚ are also accessible online‚ ensuring easy access to detailed information for optimal phone usage and maintenance.

10.2 Contacting Technical Support and Community Forums

For technical assistance‚ users can contact Polycom’s support team directly via phone or through their official website. Additionally‚ community forums and knowledge libraries are available‚ offering troubleshooting tips and solutions from experts and peers. These resources ensure comprehensive support for resolving issues and optimizing the use of the Polycom VVX 411 phone.

singer 500a manual

Overview of the Singer 500a Manual

The Singer 500a manual is a comprehensive guide for operating and maintaining the sewing machine, covering setup, features, and troubleshooting. It ensures optimal performance and longevity.

1.1 Importance of the Manual for Sewing Machine Operation

The Singer 500a manual is essential for understanding the machine’s features, proper operation, and maintenance. It provides detailed guidance on setup, troubleshooting, and customization, ensuring users can maximize the machine’s capabilities. The manual serves as a troubleshooting guide, helping users identify and resolve common issues, such as poor stitching or mechanical problems. By following the manual’s instructions, users can maintain the machine’s performance and extend its lifespan. Additionally, it offers insights into the machine’s advanced features, like special stitches and the SLANT-O-MATIC design, allowing users to explore creative possibilities. Accessing the manual is straightforward, with options to download PDF versions from trusted sources like the Sewing Dude Blog. This resource is vital for both new and experienced users, ensuring optimal use and satisfaction.

Where to Download the Singer 500a Manual

The Singer 500a manual can be downloaded from Singer’s official website, Sewing Dude Blog, or trusted sewing parts stores. Free PDF versions are widely available online.

2.1 Official Sources and Trusted Websites

The Singer 500a manual can be downloaded from the official Singer website, ensuring authenticity and reliability. Trusted sources like Sewing Dude Blog and sewing parts stores also offer free PDF versions. These websites provide comprehensive guides, including setup, maintenance, and troubleshooting instructions. The manuals are often available in full-size, clean formats without imperfections, making them ideal for users. Official sources guarantee that the content is accurate and tailored specifically for the Singer 500a model. Additionally, these platforms frequently update their resources, ensuring users have access to the most current information. Downloading from trusted sites minimizes the risk of outdated or incorrect instructions, providing a seamless experience for sewing machine operation and maintenance.

2.2 Free PDF Downloads and Instructions

Free PDF downloads of the Singer 500a manual are readily available online, offering detailed guidance for users. Websites like the Sewing Dude Blog and trusted sewing communities provide instant access to these manuals. The PDFs are often full-size and clean, ensuring clarity and ease of use. Many downloads include comprehensive instructions for setup, maintenance, and troubleshooting. Some versions are specifically marked as “Not for resale,” emphasizing their free availability for personal use. These manuals cover everything from basic operation to advanced features, making them invaluable for both beginners and experienced sewists. Additionally, large-format deluxe editions are available for those who prefer higher-quality documentation. Downloading these manuals is straightforward, with most sites offering direct links or simple right-click options to save the files.

Key Features of the Singer 500a Sewing Machine

The Singer 500a features advanced stitching options, customizable settings, and the innovative SLANT-O-MATIC design, enhancing sewing precision and versatility for a wide range of projects.

3.1 Special Stitches and Customization Options

The Singer 500a sewing machine offers an extensive range of special stitches, including decorative, utility, and stretch stitches, catering to diverse sewing needs. Users can customize stitch length, width, and tension for precise control. The machine also features adjustable settings for various fabric types, ensuring optimal results. Additionally, the SLANT-O-MATIC design allows for better visibility and smoother fabric flow, enhancing the sewing experience. Advanced customization options enable users to tailor settings to their specific projects, making the Singer 500a versatile for both basic and intricate sewing tasks. This feature-rich design makes it a preferred choice for sewists seeking creativity and precision in their work.

3.2 SLANT-O-MATIC Design and Its Benefits

The Singer 500a features the innovative SLANT-O-MATIC design, which provides an angled sewing surface for improved visibility and control. This unique feature allows users to see the needle and fabric more clearly, making it easier to manage intricate stitches and align materials accurately. The slant design also enhances fabric flow, reducing bunching and ensuring smooth operation.

The SLANT-O-MATIC design contributes to a more comfortable sewing experience by minimizing eye strain and improving precision. It is particularly beneficial for sewing delicate or layered fabrics, as it maintains consistent tension and prevents slippage. This design element is a key factor in the machine’s reputation for durability and ease of use, making it a standout choice for both beginners and experienced sewists.

Maintenance and Troubleshooting

Regular maintenance and troubleshooting are crucial for optimal performance. The manual provides clear instructions and practical advice for common issues like thread jams and motor problems. Following these guidelines ensures smooth operation and extends the machine’s longevity.

4.1 Oiling and Cleaning the Machine

Regular oiling and cleaning are essential for maintaining the Singer 500a’s performance. Apply a few drops of recommended oil, such as Tri-Flow, to the gears and moving parts. Open the side panel and top cover to access these areas. Use a soft brush to remove lint and debris from the bobbin case, feed dogs, and tension discs. Avoid using harsh chemicals or excessive force, which could damage the machine. Clean the exterior with a damp cloth to keep it dust-free. Proper maintenance ensures smooth operation, prevents rust, and extends the machine’s lifespan. Follow the manual’s specific instructions for oiling intervals and cleaning techniques to keep your Singer 500a in optimal condition.

4.2 Common Issues and Solutions

Common issues with the Singer 500a often relate to thread tension, needle breakage, or stitch irregularities. If thread bunches underneath fabric, check and adjust the bobbin tension or ensure the needle is properly threaded; Needle breakage can occur due to incorrect needle size or type; always use Singer-compatible needles. For jammed stitches, clean lint from the bobbin area and feed dogs. If the machine skips stitches, inspect the needle for damage or replace it. Lubrication issues may cause noisy operation; apply Tri-Flow oil as directed. Consult the manual for specific troubleshooting steps or diagrams. Regular maintenance and proper thread setup can prevent many of these issues, ensuring smooth operation and consistent stitching quality.

Professional Service Manual for Singer 500a

The Singer 500a Professional Service Manual offers a detailed guide for advanced users, covering comprehensive maintenance, troubleshooting, and repair procedures for models 500, 500a, 503, and 503a.

5.1 Comprehensive Guide for Advanced Users

The Singer 500a Professional Service Manual is a detailed guide tailored for advanced users, offering in-depth insights into maintenance, troubleshooting, and repair procedures. It covers models 500, 500a, 503, and 503a, ensuring comprehensive coverage for technicians and experienced sewists. The manual includes intricate diagrams, parts lists, and step-by-step instructions for complex repairs. With over 100 pages, it provides advanced techniques for optimizing machine performance and addressing technical issues. This resource is ideal for professionals seeking to service or restore their Singer 500a sewing machine to its original functionality. It emphasizes precise methods for maintaining and upgrading the machine, ensuring longevity and peak performance.

Additional Resources and Guides

Explore additional resources like the Sewing Dude Blog and other sewing communities, including forums and user discussions, for troubleshooting tips, repair guides, and maintenance advice tailored for the Singer 500a.

6.1 Sewing Dude Blog and Other Helpful Links

The Sewing Dude Blog is a valuable resource for Singer 500a users, offering detailed guides, troubleshooting tips, and maintenance advice. It provides free PDF downloads of the manual, ensuring easy access to instructions. The blog also features user discussions and community support, making it a go-to for resolving common issues. Additionally, the blog highlights the importance of proper setup and customization options. For advanced users, it references a professional service manual. Links to trusted sources like Singer’s official website are also available, ensuring authenticity. This comprehensive resource helps users optimize their sewing experience, making it an essential companion for both beginners and experienced sewists.

rent increase notice pdf

A Rent Increase Notice PDF is a formal document used by landlords to inform tenants of an upcoming rent increase. It outlines the new rental amount, effective date, and required notice period, ensuring compliance with local laws. This template is essential for maintaining legal transparency and fairness in tenant-landlord relationships.

What is a Rent Increase Notice?

A Rent Increase Notice is a formal document provided by landlords to tenants, informing them of an upcoming increase in rent. It typically includes details such as the current rent amount, the new rent amount, the effective date of the increase, and the required notice period. This notice is a legal requirement in many jurisdictions and must be delivered in writing. The document ensures transparency and fairness in the tenant-landlord relationship, allowing tenants time to prepare for the change or seek alternative housing if necessary. It is often available as a downloadable PDF template, making it easy for landlords to create and customize according to their needs and local regulations.

Why is a Rent Increase Notice Important?

A Rent Increase Notice is crucial for maintaining clear communication between landlords and tenants. It ensures that landlords comply with legal requirements when raising rent, providing tenants with adequate time to prepare or seek alternatives. This document protects both parties by formalizing the agreement and preventing disputes. Tenants receive fair notice, allowing them to budget or negotiate, while landlords avoid potential legal issues by following proper procedures. The notice also ensures transparency, outlining the exact increase and its effective date. By using a Rent Increase Notice PDF, landlords can easily create a legally binding document, promoting a smooth transition and upholding their professional obligations.

Legal Requirements for a Rent Increase Notice

Legal requirements ensure compliance with local laws, specifying minimum notice periods, required details, and proper delivery methods. They protect both landlords and tenants by preventing disputes and ensuring fairness.

Minimum Notice Periods by Jurisdiction

Minimum notice periods for rent increases vary by jurisdiction, ensuring landlords provide tenants adequate time to adjust. In British Columbia, landlords must give at least three months’ notice, while in other regions, such as Scotland, the requirement is also three months. In Texas, landlords typically need to provide 30 days’ notice. These periods are crucial for compliance with local tenancy laws and to prevent disputes. Tenants must receive written notice within the specified timeframe before the rent increase takes effect. Jurisdictions may also have specific rules about when the increase can start and the maximum allowable increase. Proper notice ensures a smooth transition for both parties.

Required Information in the Notice

A rent increase notice must include specific details to ensure clarity and compliance. The property address, current rent amount, new rent amount, and effective date of the increase are essential. Additionally, the notice should outline the required notice period, which varies by jurisdiction. Landlords must also provide their contact information for tenant inquiries. In some cases, the notice may include a section for tenant response or acknowledgement. Clear and accurate information helps prevent disputes and ensures both parties understand their obligations. Properly filled-out notices are legally binding and protect both landlords and tenants. Always verify local regulations for specific requirements. Accurate details ensure the process is fair and transparent for all involved.

Elements of a Rent Increase Notice PDF

A Rent Increase Notice PDF typically includes the landlord’s and tenant’s details, current and new rent amount, effective date, and legal compliance statements. It ensures clarity and formality.

Key Components of the Notice

A Rent Increase Notice PDF must include essential details such as the landlord’s and tenant’s names, property address, current rent amount, new rent amount, and the effective date of the increase. It should also specify the required notice period, which varies by jurisdiction, and reference any applicable local laws or regulations. The document may also provide space for tenant acknowledgment or response. Clarity and professionalism are crucial to ensure the notice is legally binding and understood by both parties. Proper formatting and compliance with legal standards make the notice enforceable and avoid potential disputes.

How to Fill Out the Notice Correctly

Filling out a Rent Increase Notice PDF requires attention to detail to ensure legal compliance and clarity. Start by entering the landlord’s and tenant’s full names, property address, and dates. Specify the current rent, new rent amount, and the effective date of the increase. Include the required notice period based on local laws. Use a clear and professional tone, avoiding legal jargon. Ensure all fields are completed accurately, and leave space for tenant acknowledgment if necessary. Review local regulations to confirm the notice complies with legal standards. Finally, maintain a copy for your records and ensure proper delivery to the tenant, following jurisdictional requirements for service methods.

Serving the Rent Increase Notice

Serving the notice requires delivering it to the tenant’s physical or agreed electronic address. Ensure timely delivery to meet the required notice period and maintain a copy for records.

Methods of Delivery

The rent increase notice must be delivered to the tenant through accepted methods. Physical delivery includes hand-delivering to the tenant or mailing to their address. Electronic delivery, if agreed upon in the tenancy agreement, allows sending via email or other digital platforms. Ensure the method complies with local regulations. Proof of delivery, such as a signed acknowledgment or email receipt, is crucial for verification. Retain a copy for records to avoid disputes. Proper delivery ensures the notice is legally valid and protects both parties’ rights. Always follow jurisdiction-specific rules to maintain compliance.

Proof of Service Requirements

Proof of service is essential to confirm that the rent increase notice was legally delivered to the tenant. This can be achieved through methods like certified mail, email with delivery receipts, or handwritten signatures upon delivery. Landlords must retain records, such as mailing receipts or signed acknowledgments, to verify compliance. In some jurisdictions, electronic delivery may require the tenant’s prior consent. Ensuring proper proof of service protects both parties and prevents potential disputes. Maintain detailed documentation to demonstrate adherence to legal standards and confirm the tenant’s awareness of the rent adjustment. This step is critical for enforcing the notice if issues arise later.

Response to a Rent Increase Notice

Tenants can review the rent increase notice, negotiate, or dispute it if it violates local laws or lease terms. Understanding legal rights and options is crucial for an informed response.

Tenant’s Options and Rights

Upon receiving a rent increase notice, tenants have several options to respond. They can choose to accept the increase, negotiate a more favorable terms, or dispute the notice if it violates local laws or lease agreements. Tenants also have the right to seek legal advice or file a complaint with housing authorities if the increase is deemed unfair or illegal. Additionally, tenants may opt to vacate the property if they cannot afford the new rent. Understanding these rights is essential for tenants to protect their interests and ensure landlords adhere to legal requirements. Proper documentation and communication are key in addressing rent increase disputes effectively.

Negotiating or Disputing the Increase

Tenants have the option to negotiate or dispute a rent increase if they believe it is unreasonable or violates local laws. Open communication with the landlord is key; tenants can request a meeting or submit a written proposal to discuss alternative terms. If the increase exceeds legal limits or does not adhere to the required notice period, tenants can formally dispute the notice. In such cases, tenants may seek mediation or consult legal professionals for assistance. Understanding local rent control laws and having documentation to support their case can strengthen a tenant’s position during negotiations or disputes. Proper evidence, such as comparable rental rates or proof of improper notice, can be crucial in resolving the matter fairly.

A Rent Increase Notice PDF ensures legal compliance and clear communication between landlords and tenants. It streamlines the process, maintaining fairness and transparency throughout the rent adjustment procedure.

Best Practices for Landlords

Landlords should ensure compliance with local laws when issuing a Rent Increase Notice PDF. Provide clear, detailed information about the increase, including the new rent amount and effective date. Adhere to minimum notice periods, which vary by jurisdiction, to avoid disputes. Use official templates to maintain professionalism and legal accuracy. Communicate respectfully with tenants, addressing any concerns promptly. Keep a record of all notices and related correspondence for documentation. Consider the tenant’s financial situation and market rates when determining increases. Regularly review and update rental agreements to reflect changes. Seeking legal advice ensures adherence to regulations and minimizes potential conflicts. Proper documentation and transparency foster trust and maintain a positive landlord-tenant relationship.

Final Thoughts on Rent Increase Notices

A Rent Increase Notice PDF is a critical tool for landlords to communicate rent adjustments legally and transparently. It ensures compliance with local regulations while maintaining clear communication with tenants; Landlords must balance their right to increase rent with tenants’ rights to fair notice and reasonable adjustments. Using a well-structured template helps avoid disputes and ensures all required information is included. Tenants should review the notice carefully and seek advice if needed. Open dialogue between landlords and tenants fosters understanding and cooperation. Properly handling rent increases preserves the tenant-landlord relationship and maintains a positive rental environment. Always prioritize accuracy, fairness, and respect in the process.

samsung air source heat pump manual

Installation Instructions

Ensure proper location and space for installation, considering ventilation and noise levels․ Pre-installation checks include verifying compatibility and ensuring all components are undamaged․
Follow manufacturer guidelines for outdoor unit placement and refrigerant handling․ Always adhere to safety precautions and local regulations during setup․ Use certified installers for optimal performance․

1․1 Key Considerations for Location and Space

Ensure adequate space for installation, considering proper ventilation and noise reduction․ Avoid proximity to windows or sensitive areas to minimize noise impact․ The outdoor unit should be placed in a well-ventilated area, away from flammable materials․ Ensure easy accessibility for maintenance and refrigerant handling․ Follow manufacturer guidelines for optimal placement and safety․

1․2 Pre-Installation Checks and Requirements

Verify system compatibility with existing infrastructure and ensure all components are undamaged․ Check electrical connections and refrigerant levels before installation․ Confirm that the installation site meets safety regulations and manufacturer guidelines․ Ensure the area is clear of flammable materials and that proper ventilation is available․ Conduct a final inspection of the unit and surroundings to ensure readiness for installation․

System Components Overview

The Samsung air source heat pump system includes an indoor unit with advanced features like quiet operation and smart compatibility, an outdoor unit designed for durability, and a controller for precise temperature management․ These components work together to provide efficient heating and cooling solutions while minimizing energy consumption․

2․1 Indoor Unit Specifications and Features

The Samsung indoor unit offers advanced features like quiet operation, smart compatibility, and a sleek design․ With capacities ranging from 5kW to 16kW, it provides efficient heating and cooling․ Key features include quiet mode, smart integration with ClimateHub, and high energy efficiency, ensuring optimal performance and comfort in various spaces․

2․2 Outdoor Unit Dimensions and Requirements

The outdoor unit dimensions vary by model, with compact designs for space efficiency․ Ensure installation in well-ventilated areas, avoiding direct sunlight and water exposure․ Maintain required clearance for proper airflow and drainage․ Check local regulations for prohibited locations, such as near flammable materials or restricted zones․ Follow Samsung’s guidelines for optimal performance and safety;

2․3 Controller Functions and Compatibility

The Samsung controller enables seamless operation of heating, cooling, and quiet modes․ It supports smart integration with compatible systems and devices․ Compatible with ClimateHub Mono configurations, it offers advanced control and monitoring․ The controller is designed for user-friendly navigation, ensuring optimal system performance and energy efficiency․ Refer to the manual for detailed compatibility and function details․

Operating Modes and Settings

The system offers heating, cooling, and quiet modes for optimal comfort․ Settings include dehumidification and noise reduction features․ Adjust modes via the controller for energy efficiency and tailored comfort․ Refer to the manual for detailed optimization tips and mode customization options․

3․1 Heating Mode Operation and Optimization

The Samsung air source heat pump efficiently operates in heating mode by maintaining a steady temperature for optimal performance․ Adjust the thermostat to your desired setting and avoid frequent changes for energy efficiency․ Regular maintenance, such as cleaning filters, ensures reliable operation․ Use the controller to customize heating settings for enhanced comfort and energy savings․ Optional accessories can further optimize heating performance during colder months․

3․2 Cooling Mode and Dehumidification Features

The Samsung air source heat pump excels in cooling mode, providing efficient dehumidification for enhanced comfort․ Use the controller to adjust settings, ensuring optimal cooling performance․ The system effectively balances temperature and humidity, reducing moisture in the air․ Regular filter maintenance is crucial for maintaining cooling efficiency and air quality during operation․

3․3 Quiet Mode and Noise Reduction Settings

The Samsung air source heat pump features a 4-Step Quiet Mode, reducing outdoor unit noise to as low as 35dB(A)․ This setting minimizes operational disturbances, ideal for residential areas․ Enable Quiet Mode via the controller to adjust fan speed and compressor operation for lower noise levels․ Regular maintenance ensures optimal noise reduction performance․

Technical Specifications and Performance

The Samsung AM100AXVANH/TL heat pump delivers 28 kW cooling and 31․5 kW heating capacities, ensuring high energy efficiency and low noise levels for optimal performance․

4․1 Heating and Cooling Capacity Ranges

The Samsung AM100AXVANH/TL heat pump provides 28 kW cooling capacity and 31․5 kW heating capacity, ensuring efficient climate control․ It operates effectively across a wide temperature range, from -20°C to 35°C, delivering reliable performance in both heating and cooling modes for various environmental conditions․

4․2 Energy Efficiency Ratings and Certifications

The Samsung air source heat pump meets international energy efficiency standards, with high SEER and SCOP ratings․ It is RoHS compliant, ensuring eco-friendly design and operation․ The system offers smart integration, optimizing energy use and reducing consumption․ Its energy-saving modes and renewable energy utilization enhance overall efficiency, making it a sustainable choice for heating and cooling needs․

4․3 Noise Level Specifications and Measurements

The Samsung air source heat pump operates at low noise levels, with the outdoor unit achieving as low as 35dB(A) in Quiet Mode․ Proper installation ensures minimal noise disruption․ Measurements are taken under standard operating conditions, and the system is designed to maintain optimal performance while minimizing auditory impact during heating and cooling cycles․

Maintenance and Troubleshooting

Regular maintenance includes cleaning filters and checking refrigerant levels․ Troubleshooting involves identifying common issues like error codes and performing system resets․ Always refer to the manual for guidance․

5․1 Recommended Maintenance Schedule

Perform monthly filter cleaning and inspect for blockages․ Check refrigerant levels and connections every 3 months․ Schedule annual professional servicing to ensure optimal performance․ Regularly inspect pipes and electrical connections for damage or leaks․ Monitor system performance and address any unusual noises or drops in efficiency promptly․ Always follow the manual’s guidelines․

5․2 Common Issues and Diagnostic Steps

Common issues include error codes, refrigerant leaks, and reduced performance․ Check for blockages in air intakes and ensure proper ventilation․ Inspect refrigerant lines for damage and leaks․ If error codes appear, refer to the manual or contact Samsung support․ Reset the system if necessary and monitor performance after addressing issues․

5․3 Resetting the System and Error Codes

To reset the system, turn off power, wait 30 seconds, and restart․ Common error codes like E1, E2, or E3 indicate specific issues․ Refer to the manual for code meanings․ If resetting doesn’t resolve the issue, contact Samsung support for further assistance․ Always ensure safety when handling electrical components․

Safety Precautions and Warnings

Ensure adequate ventilation to prevent refrigerant leaks․ Avoid installing near flammable materials or water sources․ Follow guidelines for handling refrigerants safely․ Keep the unit out of reach of children and pets․ Always turn off power before maintenance․ Adhere to local safety regulations and manufacturer instructions․

6․1 Ventilation Requirements for Safe Operation

Ensure adequate ventilation for safe operation․ In small rooms, proper airflow must be maintained to prevent refrigerant leakage risks․ Keep a minimum clearance of 1 meter around the unit․ Avoid obstructions to ensure efficient airflow․ Regularly inspect vents for blockages․ Proper ventilation ensures optimal performance and safety compliance․

6․2 Prohibited Installation Locations

Avoid installing the heat pump in areas with mineral oil, near gas boilers, or where water splashes occur․ Do not install in spaces using electric generators or with risk of refrigerant leakage․ Ensure the location complies with safety guidelines and local regulations to prevent hazards and maintain efficiency․ Always consult the manual for specific restrictions․

6․3 Handling Refrigerants and Safety Guidelines

Handle refrigerants with care, using protective gear and proper tools․ Ensure safe disposal and avoid direct contact․ In case of leakage, ventilate the area immediately․ Follow environmental regulations and manufacturer guidelines for handling and storage․ Always use certified equipment and procedures to prevent accidents and ensure compliance with safety standards․

Warranty and Support Information

Register your Samsung air source heat pump to activate warranty benefits․ Contact support for assistance or visit the official website for manuals and technical resources․ Ensure compliance with warranty terms for optimal coverage and service․

7․1 Warranty Registration and Terms

Register your Samsung air source heat pump online to activate warranty coverage․ Terms vary by region but typically include parts and labor for up to 5-7 years․ Ensure compliance with installation and maintenance guidelines to maintain warranty validity․ Refer to the official Samsung website or manual for detailed terms and conditions․

7․2 Contacting Samsung Support

For assistance, visit Samsung’s official website or call their support hotline․ Live chat and email options are also available․ Ensure to have your product serial number ready for efficient service․ Refer to the user manual or warranty registration confirmation for contact details and regional support information․

7․3 Online Resources and Manuals

Access the Samsung air source heat pump manual and additional resources on their official website․ Download technical data, diagrams, and user guides for detailed instructions․ Visit regional support sites like www․freedomhp․co․uk for specific information․ YouTube also offers video guides for installation and operation, ensuring comprehensive support for optimal system performance and troubleshooting․

User Guides and Manuals

Download the Samsung air source heat pump manual for detailed specifications, installation guides, and operating instructions․ The manual covers models like AM100AXVANH/TL, providing technical data and diagrams․ Visit the official Samsung website or regional support sites for additional resources and user guides․

8․1 Downloading the Samsung Air Source Heat Pump Manual

To access the Samsung air source heat pump manual, visit the official Samsung website or regional support sites like www․jouleuk․co․uk․ The manual is available as a PDF, offering detailed specifications, installation guides, and technical diagrams for models such as the AM100AXVANH/TL․ Ensure you download the correct version for your specific unit to get accurate information for optimal performance and troubleshooting․

8․2 Navigating the User Guide

The Samsung air source heat pump manual is structured for easy navigation, starting with technical specifications and installation guidelines․ Sections include operating modes, maintenance schedules, and troubleshooting tips․ Detailed diagrams and error code explanations are provided for clarity․ Users can quickly access information on energy efficiency, smart integration, and warranty details for optimal system management․

8․3 Technical Data and Diagrams

The manual includes detailed technical specifications, such as unit dimensions, heating and cooling capacities, and system compatibility․ Diagrams illustrate system architecture, component connections, and refrigerant flow․ Key parameters like noise levels, energy efficiency, and operational limits are highlighted, ensuring precise installation and optimal performance of the Samsung air source heat pump․

Additional Features and Configurations

Discover smart integration compatibility, ClimateHub Mono configuration, and optional accessories for enhanced functionality and personalized system upgrades in the Samsung air source heat pump․

9․1 Smart Integration and Compatibility

The Samsung air source heat pump offers seamless smart integration, enabling compatibility with smart home systems like Samsung SmartThings․ It supports voice control via Amazon Alexa and Google Assistant for convenient operation․ The system also integrates with the ClimateHub Mono configuration, allowing advanced control and real-time monitoring through dedicated mobile apps․

9․2 ClimateHub Mono Configuration

The ClimateHub Mono configuration streamlines control of Samsung air source heat pumps, enabling efficient management of heating and hot water systems․ It integrates seamlessly with Samsung’s smart technology, offering advanced scheduling and temperature optimization․ This setup ensures optimal performance while maintaining compatibility with existing smart home integrations for enhanced convenience and energy efficiency․

9․3 Optional Accessories and Upgrades

Optional accessories include smart sensors for remote monitoring and voice control compatibility․ Upgrades such as advanced controllers enhance system performance․ Additional components like insulation kits or advanced filtration systems can improve efficiency and air quality․ These upgrades ensure compatibility with smart home systems, offering enhanced convenience and energy-saving capabilities for Samsung air source heat pumps․

Environmental and Energy-Saving Benefits

Samsung air source heat pumps utilize renewable energy from the air, reducing reliance on fossil fuels․ They offer high energy efficiency, lowering emissions and operating costs while promoting eco-friendly heating and cooling solutions․

10․1 Renewable Energy Source Utilization

The Samsung air source heat pump harnesses renewable energy from ambient air, providing efficient heating and cooling․ By utilizing air as a sustainable resource, it significantly reduces reliance on fossil fuels, lowering carbon emissions and operational costs while promoting eco-friendly energy solutions․

10․2 Energy-Saving Modes and Efficiency

The Samsung air source heat pump features advanced energy-saving modes, optimizing performance by adapting to real-time conditions․ Smart technologies minimize energy waste, while high Coefficient of Performance (COP) ratings ensure efficient heating and cooling․ These modes reduce operational costs and environmental impact, aligning with energy-saving goals and promoting sustainable usage․

10․3 Eco-Friendly Design and Compliance

The Samsung air source heat pump is designed with eco-friendly materials and complies with international environmental standards like RoHS․ It uses R32 refrigerant, which has a lower environmental impact․ The system’s energy-efficient design reduces carbon emissions and promotes sustainable energy use, aligning with global environmental regulations and supporting eco-conscious living․

trailer boat guides

Launching and Retrieving Your Boat: A Step-by-Step Guide

Position the trailer at the boat ramp‚ ensuring the boat is centered․ Perform safety checks‚ including lights and brakes․ Launch by slowly backing the trailer into the water until the boat floats free․ Retrieve by reversing the process‚ using guide poles to align the boat with the trailer․

Positioning Your Trailer at the Boat Ramp

Position the trailer at the boat ramp by centering the boat on the trailer and aligning it with the ramp’s centerline․ Ensure the trailer is oriented correctly for the direction of the launch․ Secure the coupler to the towing vehicle and use guide poles or markers to maintain alignment․ Proper positioning ensures a smooth launch and retrieval process‚ minimizing the risk of damage or complications during the procedure․

Safety Checks Before Launching

Before launching‚ inspect the trailer for proper tire pressure‚ functional brakes‚ and secure lighting connections․ Ensure the coupler is safely attached to the towing vehicle and verify that safety chains are correctly secured․ Check the winch and straps to confirm the boat is tightly fastened to the trailer․ Perform a final walk-around to ensure all components are in good condition and ready for the launch․ Regular maintenance is key to preventing issues during the process․

Common Mistakes to Avoid During Launching

Avoid improper trailer alignment with the ramp‚ as it can cause the boat to drift or the trailer to jackknife․ Never rush the launching process‚ as this increases the risk of accidents․ Ensure the boat is fully submerged before releasing it from the trailer․ Always check the water depth to prevent the trailer from bottoming out․ Finally‚ never leave the boat unattended during launch‚ as it may float away or collide with nearby objects․

Choosing the Right Boat Trailer for Your Needs

Selecting the ideal trailer involves considering boat size‚ weight‚ and hull type․ Evaluate between roller and bunk trailers for optimal support and launching ease‚ ensuring compatibility and durability for safe towing and storage solutions․

Types of Boat Trailers: Roller vs․ Bunk Trailers

Roller trailers feature cylindrical rollers that cradle the boat’s hull‚ offering low friction for easy loading and launching․ Bunk trailers use carpeted or wooden bunks to support the boat’s keel‚ providing stability and protection․ Roller trailers are ideal for frequent use and rough ramps‚ while bunk trailers suit smoother surfaces and long-term storage‚ ensuring your boat stays secure and protected․

Key Factors to Consider When Selecting a Trailer

When choosing a trailer‚ consider your boat’s size‚ weight‚ and hull type․ Ensure the trailer’s capacity exceeds your boat’s loaded weight․ Material options include aluminum for lightweight durability and steel for strength․ Axle and braking systems should match your towing needs․ Consider suspension for smooth transport and corrosion-resistant coatings if used in saltwater․ Custom features like guide rails or a winch can enhance functionality‚ ensuring a secure and efficient towing experience․

Maintaining Your Boat Trailer for Optimal Performance

Regularly inspect tires‚ brakes‚ and wiring․ Lubricate axles and hinges to ensure smooth operation․ Clean and protect metal parts from corrosion‚ especially after saltwater exposure․ Always check trailer lights before towing for safety compliance and replace any damaged components promptly to avoid roadside issues during transportation․ Keep spare tires and tools handy for quick repairs‚ ensuring your trailer remains reliable and roadworthy․ Perform routine maintenance to extend the lifespan of your trailer and secure your boat safely during travel․

Regular Maintenance Tasks to Keep Your Trailer in Shape

Inspect tires for wear and proper inflation‚ ensuring they meet load ratings․ Check brakes and wiring for functionality․ Grease axles and hinges periodically․ Clean and protect metal parts from rust․ Replace any damaged components promptly․ Regularly wash the trailer to remove dirt and salt residue․ Store the trailer on level ground when not in use․ Perform these tasks to extend the trailer’s lifespan and ensure safe towing․ Always refer to the manufacturer’s guidelines for specific maintenance recommendations tailored to your trailer model․ Keeping up with routine checks will prevent costly repairs and ensure reliability on the road․ Maintain your trailer meticulously to guarantee secure transportation of your boat every time․ By following these steps‚ you’ll keep your trailer in optimal condition year-round․ Regular maintenance is key to avoiding breakdowns and ensuring your boating adventures remain hassle-free․ Stay proactive with upkeep to enjoy smooth‚ worry-free towing experiences․

Essential Tools and Spare Parts for Trailer Maintenance

Keep a well-stocked toolkit with a wrench‚ pliers‚ screwdrivers‚ and a tire pressure gauge․ Maintain spare tires‚ hubs‚ and bearings․ Carry extra trailer lights‚ fuses‚ and wiring components․ Store grease for axle lubrication and a trailer jack for lifting․ Include tie-down straps‚ bolts‚ and nuts for repairs․ Always have a spare wheel and a comprehensive repair kit․ These items ensure you’re prepared for routine maintenance and unexpected fixes‚ keeping your trailer operational and safe․ Regularly check and restock your supplies to avoid delays during trips․ A well-equipped toolkit and spare parts collection can prevent minor issues from becoming major problems․ Stay organized and proactive with your trailer maintenance needs․ By having the right tools and parts on hand‚ you’ll be ready to address any situation that arises․ This preparedness is crucial for maintaining your trailer’s longevity and performance․ Keep your tools clean and accessible‚ and familiarize yourself with their use․ Proper organization and maintenance of these essentials will save time and reduce stress․ Always prioritize having the necessary tools and spares to handle trailer upkeep effectively․ Your preparedness will ensure smooth boating adventures every time․

Towing Rules and Regulations: What You Need to Know

Understand local towing laws‚ including weight limits‚ brake requirements‚ and safety standards․ Ensure your trailer meets all legal specifications for safe and compliant transportation on public roads․

Understanding Towing Laws and Requirements

Towing laws vary by location‚ so research local regulations before transporting your boat․ Ensure your trailer meets weight limits‚ safety chain requirements‚ and tire standards․ Brake systems must comply with legal specifications‚ and all lighting must function properly․ Familiarize yourself with towing permits and size restrictions․ Always carry a towing guide and consult local authorities for specific rules․ This ensures safe‚ legal‚ and hassle-free transportation of your boat trailer․

Logistics of Towing: Safety Tips and Best Practices

Always check tire pressure and ensure the trailer is properly secured to your vehicle․ Use safety chains and verify all lighting functions․ Maintain a safe distance while towing and avoid sudden maneuvers․ Practice backing up in open spaces to improve control․ Keep an emergency kit and spare parts on hand; Ensure the boat is evenly loaded and tied down securely to prevent shifting during transport․ Regular inspections and adherence to towing guidelines are crucial for a safe journey․

Loading and Unloading Your Boat: Safety First

Ensure the trailer is stable before loading․ Use guide poles to align the boat center․ Secure the boat with straps and tie-downs․ Check all fasteners before transport․

Proper Techniques for Loading Your Boat onto the Trailer

Start by positioning the trailer in shallow water‚ ensuring the bunks or rollers align with the boat’s hull․ Use guide poles to direct the boat onto the trailer․ Slowly winch or power-load the boat‚ keeping it centered․ Secure the boat with straps and tie-downs‚ ensuring even pressure․ Double-check all fasteners and ensure the boat is tightly fastened before transport․ This ensures safe and efficient loading every time․

Unloading Your Boat Safely at the Destination

Reverse the trailer into the water‚ ensuring the boat aligns with the ramp․ Use guide poles to direct the boat away from the trailer․ Once the boat floats‚ disconnect the winch strap and safety chains․ Check brakes and lights before moving․ Secure the trailer ashore and ensure the area is clear of obstacles․ Always maintain control during the process to prevent accidents and damage․

Storing Your Boat Trailer: Best Practices

Clean and lubricate moving parts‚ protect tires‚ and use a cover․ Store in a secure‚ level area to prevent damage and ensure stability․

How to Prepare Your Trailer for Long-Term Storage

Clean the trailer thoroughly‚ removing dirt and grime․ Lubricate hinges and axles to prevent rust․ Protect tires from UV exposure and moisture․ Use a breathable cover to shield from dust and mildew․ Store in a secure‚ level area to maintain balance and prevent damage․ Ensure all lights and brakes are functional before storage․ Regularly inspect for pests and wear during storage periods․

Storage Options: Indoor vs․ Outdoor Solutions

Indoor storage offers protection from weather‚ UV rays‚ and pests‚ ideal for long-term preservation․ Outdoor storage is cost-effective and convenient‚ suitable for short-term use․ Covered outdoor options like sheds or canopies provide moderate protection․ Choose based on climate‚ budget‚ and trailer size․ Regular maintenance is crucial for both options to ensure the trailer remains in optimal condition․ Always secure the trailer to prevent theft and damage․

DIY Modifications to Enhance Your Boat Trailer

Transform your trailer with clever DIY projects‚ such as adding storage solutions‚ LED lighting‚ or a protective coating․ Customize to improve functionality and longevity for a personalized touch․

Popular DIY Projects to Improve Trailer Functionality

Popular DIY projects include adding storage compartments‚ installing LED lighting‚ and applying protective coatings․ Functional upgrades like winch stands and guide rails enhance ease of use․ Customizing with tie-down systems and organizing tools improves efficiency․ These modifications not only boost functionality but also extend the trailer’s longevity‚ ensuring a safer and more personalized setup for your boat․

Tips for Customizing Your Trailer to Your Needs

Customizing your trailer involves tailoring it to fit your boat’s specifications and personal preferences․ Consider adding carpeted bunks for hull protection or installing a winch extension for easier loading․ LED lighting improves visibility‚ while storage solutions like compartments keep gear organized․ Ensure all modifications are durable and weather-resistant to withstand frequent use and outdoor conditions‚ enhancing both functionality and convenience for your boating adventures․

Boat Trailer Safety: Essential Equipment and Practices

Ensure trailer safety with proper hitch connections‚ functioning brakes‚ and secure tie-downs․ Always use safety chains and check tire pressure before towing to prevent accidents․

Must-Have Safety Gear for Your Trailer

Essential safety gear includes a properly secured hitch‚ functioning brake lights‚ and reflective markers for visibility․ Ensure safety chains are attached and a tire pressure gauge is on hand․ A spare tire and wheel are crucial‚ along with a jack for emergencies․ Secure tie-down straps and a winch with a bow stop prevent shifting during transit․ Always carry a fire extinguisher and first aid kit․ Proper safety gear ensures secure towing and prevents potential hazards on the road․

Best Practices for Secure Tying and Transportation

Use heavy-duty tie-down straps to secure the boat to the trailer‚ ensuring even distribution of weight․ Cross straps over the hull and tighten firmly to prevent movement․ Attach safety chains to the trailer and vehicle‚ ensuring they can hold the boat’s weight․ Double-check all connections‚ including the hitch and brake lights․ Drive slowly‚ avoiding sudden movements‚ and stop periodically to inspect the setup․ Proper securing minimizes risks during transport and ensures safe arrival at your destination․

Advanced Tips for Trailer Boating

Master precision backing and tight-space maneuvers by practicing regularly․ Stay calm‚ use reference points‚ and communicate clearly with spotters․ Always be prepared for unexpected challenges on the water or road․

Mastering Backing Up and Maneuvering in Tight Spaces

Mastering the art of backing up your boat trailer requires patience and practice․ Always use a spotter to guide you‚ especially in tight spaces․ Start on flat ground to build confidence․ When maneuvering‚ make small‚ gradual turns and keep the trailer in your line of sight․ Practice reversing slowly‚ using reference points on the trailer and vehicle․ Stay calm‚ and never rush the process․ Proper alignment and communication are key to avoiding obstacles and ensuring a smooth experience․

Troubleshooting Common Issues on the Road

Common issues while towing include trailer light malfunctions‚ tire blowouts‚ and hitch problems․ Always carry a roadside emergency kit with spare tires‚ a multimeter‚ and a wiring diagram․ For light issues‚ check connections and bulbs․ Inspect tires regularly for wear and proper pressure․ If the trailer sways‚ adjust the load distribution or use a stabilizer․ Practice diagnosing problems to ensure safe and efficient troubleshooting on the go․

voodoo lab pedal power 2 plus manual

The Voodoo Lab Pedal Power 2 Plus is a professional-grade power supply designed for guitar pedals‚ offering reliable power delivery and advanced features for musicians.

1.1 Overview of the Pedal Power 2 Plus

The Voodoo Lab Pedal Power 2 Plus is a high-performance power supply designed to meet the diverse needs of guitarists. It features eight isolated 9V DC outputs‚ each regulated and short-circuit protected to ensure reliable operation. With advanced filtering‚ it minimizes noise and interference‚ making it ideal for professional setups. The unit supports a wide range of pedals‚ including high-current models like Line 6 and Boss Twin pedals‚ ensuring consistent performance and versatility for any rig.

1.2 Importance of Proper Power Supply for Guitar Pedals

A proper power supply is essential for optimal pedal performance‚ ensuring stable voltage and minimizing noise. Improper power can damage pedals or cause tonal inconsistencies. Using a high-quality power supply like the Pedal Power 2 Plus prevents these issues‚ safeguarding your gear and maintaining sound quality. It eliminates the risks associated with daisy-chaining or using low-quality adapters‚ providing a reliable foundation for your effects setup.

Key Features of the Voodoo Lab Pedal Power 2 Plus

The Voodoo Lab Pedal Power 2 Plus offers high-quality‚ isolated 9V outputs‚ regulated for stability‚ ensuring reliable power delivery to guitar pedals‚ ideal for live performances.

2.1 Eight 9V Outputs for Guitar Effects

The Pedal Power 2 Plus features eight 9V DC outputs‚ each providing clean‚ regulated power. These outputs are designed to accommodate a variety of guitar effects pedals‚ ensuring stable operation and minimizing noise. With isolated outputs‚ interference between pedals is reduced‚ allowing for a more consistent tone. This makes it an ideal choice for pedalboards with multiple effects‚ delivering reliable power without compromising sound quality.

2.2 Isolated‚ Short-Circuit Protected‚ and Regulated Outputs

The Pedal Power 2 Plus boasts isolated‚ short-circuit protected‚ and regulated outputs‚ ensuring clean and reliable power delivery. Isolation prevents interference between pedals‚ while short-circuit protection safeguards against cable or pedal malfunctions. Each output is highly filtered and regulated‚ maintaining consistent voltage and minimizing noise. This design guarantees stable performance for all connected pedals‚ protecting both the power supply and effects from potential damage or operational issues.

2.3 Variable Voltage Outputs for Simulating Worn Batteries

The Pedal Power 2 Plus features two variable voltage outputs‚ allowing users to simulate the tone of worn batteries. By adjusting the voltage‚ players can achieve the natural sag and warmth associated with vintage pedals. This unique feature enhances tonal flexibility‚ enabling musicians to dial in the perfect sound for their rig. It ensures compatibility with a wide range of effects‚ preserving the authentic character of classic guitar tones.

Differences Between Pedal Power 2 and Pedal Power 2 Plus

The Pedal Power 2 Plus offers enhanced features‚ including variable voltage outputs and higher current capacity on outputs 5 and 6‚ making it more versatile for demanding pedals.

3.1 Output Current Capacity

The Pedal Power 2 Plus boasts higher output current capacity compared to its predecessor‚ with outputs 5 and 6 delivering up to 250mA each‚ making them ideal for high-current pedals like Line 6 and Boss Twin models. This upgrade ensures stable power delivery for modern‚ power-hungry effects‚ preventing voltage drop and maintaining consistent performance. This feature is crucial for professional setups requiring reliable power distribution across multiple pedals.

3.2 Special Features of the Plus Model

The Plus model introduces variable voltage outputs‚ allowing users to simulate worn batteries for vintage tonal authenticity. Outputs 5 and 6 can deliver higher current‚ supporting power-hungry pedals like Line 6 and Boss Twin models. This enhanced capability ensures compatibility with modern effects‚ while maintaining the reliability and isolation that define the Pedal Power series. These features make the Plus model a versatile choice for diverse pedalboard setups.

Unpacking and Contents of the Pedal Power 2 Plus

The box includes the Pedal Power 2 Plus unit‚ warranty card‚ AC power cord‚ and various DC cables with different connectors for versatile connectivity needs.

4.1 Included Cables and Connectors

The Pedal Power 2 Plus includes a variety of DC power cables to accommodate different pedal requirements. These include 5.5×2.1mm right-angle and straight barrel connectors‚ a 5.5×2.5mm red barrel connector for 12V pedals‚ and a 3.5mm mini plug for special effects. The cables are designed to ensure secure connections and flexibility‚ catering to a wide range of pedal configurations and power needs.

4.2 System Unit and Accessories

The Pedal Power 2 Plus system unit is built with durable‚ high-quality components‚ ensuring reliable performance. Accessories include a warranty card‚ AC power cord‚ and various DC cables. The compact design allows easy integration into pedalboards‚ while the comprehensive kit ensures all power needs are met‚ making it a complete solution for musicians seeking to organize and power their effects pedals efficiently and effectively.

Safety Instructions and Precautions

Ensure the Pedal Power 2 Plus is not exposed to moisture or rain to prevent electric shock or fire. Always use a grounded mains outlet and read the manual thoroughly to avoid improper usage and potential damage to your equipment.

5.1 Grounding and Moisture Protection

Proper grounding is essential to prevent electric shock. The Pedal Power 2 Plus must be connected to a mains socket with a protective grounding connection. Avoid exposing the unit to rain or moisture‚ as this can cause fire hazards or electrical issues. Ensure the device is stored in a dry environment and never operate it in damp conditions. This adheres to UL and CSA safety standards‚ ensuring reliable and safe performance for your guitar pedals.

5.2 Avoiding Short Circuits and Overloads

To prevent short circuits‚ ensure all power cables are in good condition and properly connected. Avoid using damaged or incorrect connectors‚ as this can cause electrical issues. Overloads can be avoided by not exceeding the unit’s current capacity. Each output is short-circuit protected‚ temporarily shutting off power to the affected pedal while others remain operational. Always use the correct cables and follow the manual’s guidelines to maintain safe and reliable performance.

Variable Voltage Outputs and Their Usage

The Voodoo Lab Pedal Power 2 Plus features variable voltage outputs to simulate worn batteries‚ enabling vintage tone reproduction and customization for specific pedal requirements.

6.1 Simulating Worn Batteries for Vintage Tone

The Voodoo Lab Pedal Power 2 Plus includes variable voltage outputs‚ allowing users to simulate worn batteries. This feature is ideal for achieving the distinctive‚ warm tones often associated with vintage pedals. By adjusting the voltage‚ musicians can replicate the sound of aged batteries‚ adding character and depth to their guitar effects. This capability enhances the versatility of the power supply‚ catering to those seeking authentic vintage tones.

6.2 Configuring Outputs for Specific Pedals

The Pedal Power 2 Plus allows precise configuration of its outputs to match the power requirements of specific pedals. Using the DIP switches‚ users can set outputs to deliver the exact voltage needed‚ ensuring optimal performance. For example‚ Line6 and Boss Twin pedals require higher current‚ which can be achieved by configuring outputs 5 and 6 with the appropriate settings. This customization ensures compatibility and prevents damage‚ making it ideal for diverse pedal setups.

Using High-Current Outputs for Modern Pedals

Outputs 5 and 6 on the Pedal Power 2 Plus are designed for high-current applications‚ ideal for modern pedals like Line6 and Boss Twin models‚ ensuring stable power delivery.

7.1 Outputs 5 and 6 for High-Current Applications

Outputs 5 and 6 on the Pedal Power 2 Plus are designed to handle high-current demands‚ making them ideal for powering modern pedals like Line6 and Boss Twin models. These outputs are capable of delivering up to 250mA of current‚ ensuring stable operation for power-hungry effects. By setting the DIP switches on these outputs to the “HIGH” position‚ you can double the current capacity‚ providing ample power for pedals that require more energy. This feature is essential for maintaining consistent performance and preventing any potential power-related issues during live performances or recording sessions. Properly configuring these outputs with the included current-doubler cable ensures optimal power delivery‚ safeguarding your pedals from damage and ensuring reliable operation. Always refer to the manual to confirm the correct setup for your specific pedals to avoid overloading or short circuits. This ensures your high-current pedals receive the power they need to function flawlessly. By utilizing outputs 5 and 6 effectively‚ you can power even the most demanding pedals with confidence‚ knowing your setup is both secure and efficient. This makes the Pedal Power 2 Plus an indispensable tool for musicians who rely on modern‚ high-performance effects pedals in their rigs. The ability to handle high-current applications seamlessly integrates with the rest of the unit’s features‚ providing a comprehensive power solution for any pedalboard configuration. Whether you’re using a single high-current pedal or multiple effects‚ outputs 5 and 6 are designed to meet your needs without compromising on performance or reliability. This ensures your pedalboard remains organized‚ efficient‚ and most importantly‚ free from power-related issues‚ allowing you to focus on your music without distractions. The Pedal Power 2 Plus continues to be a trusted choice among professional musicians due to its robust design and ability to cater to a wide range of power requirements‚ including those of modern‚ high-current pedals. By investing in this power supply‚ you’re not only ensuring the optimal performance of your effects but also protecting your valuable gear from potential damage caused by insufficient or unstable power sources. Outputs 5 and 6 are a testament to the unit’s versatility and its ability to adapt to the evolving needs of musicians‚ making it a future-proof investment for any serious guitarist or bassist. With the Pedal Power 2 Plus‚ you can confidently power your entire pedalboard‚ knowing that each pedal is receiving the exact amount of power it needs to function at its best. This level of precision and reliability is what sets the Pedal Power 2 Plus apart from other power supplies on the market‚ solidifying its reputation as a professional-grade solution for discerning musicians. Whether you’re performing on stage‚ recording in the studio‚ or practicing at home‚ outputs 5 and 6 ensure that your high-current pedals are always powered correctly‚ eliminating any guesswork and providing peace of mind. This attention to detail in the design of the Pedal Power 2 Plus underscores Voodoo Lab’s commitment to delivering products that meet the highest standards of quality and performance‚ making it a preferred choice among professionals and enthusiasts alike. By leveraging the capabilities of outputs 5 and 6‚ you can unlock the full potential of your high-current pedals‚ achieving the tones and effects you desire without any limitations imposed by insufficient power. This ensures that your musical expression remains unrestricted‚ allowing you to focus on creating the best possible sound. The Pedal Power 2 Plus is more than just a power supply; it’s a vital component of your musical setup‚ ensuring that every pedal performs at its peak‚ and outputs 5 and 6 are central to this capability. With their high-current capacity and flexible configuration options‚ these outputs are designed to handle even the most demanding pedals‚ providing a stable and reliable power source that you can depend on. This level of performance and reliability is why the Pedal Power 2 Plus remains a cornerstone of professional pedalboards worldwide. By utilizing outputs 5 and 6 effectively‚ you’re not only powering your pedals but also safeguarding your investment in your musical gear‚ ensuring that it continues to perform flawlessly for years to come. The attention to detail and commitment to quality in the design of the Pedal Power 2 Plus are evident in the performance of outputs 5 and 6‚ making them an essential feature for any musician seeking a professional-grade power solution. Whether you’re a seasoned professional or an aspiring artist‚ the Pedal Power 2 Plus‚ with its high-current outputs‚ is the perfect choice for powering your pedalboard‚ ensuring that your music is always at its best. Outputs 5 and 6 are a key part of what makes this power supply so versatile and reliable‚ providing the necessary power for modern pedals while maintaining the quality and performance that Voodoo Lab is known for. By choosing the Pedal Power 2 Plus‚ you’re selecting a power supply that is not only capable of meeting your current needs but also adaptable to future requirements‚ ensuring that your pedalboard remains efficient and effective as your musical journey evolves. This forward-thinking design approach is why the Pedal Power 2 Plus is widely regarded as one of the best power supplies available for guitarists and bassists. Outputs 5 and 6 exemplify this philosophy‚ offering a robust and flexible solution for high-current applications that is both easy to use and dependable. With the Pedal Power 2 Plus‚ you can trust that your pedals are receiving the power they need to perform at their best‚ allowing you to focus on your music without worrying about power-related issues. This level of confidence is invaluable for musicians‚ and it’s exactly what the Pedal Power 2 Plus delivers‚ making it an indispensable tool for any serious musician. By incorporating outputs 5 and 6 into your pedalboard setup‚ you’re ensuring that your high-current pedals are powered correctly‚ which is crucial for maintaining the integrity of your sound and the longevity of your gear. The Pedal Power 2 Plus is more than just a power supply; it’s a comprehensive solution designed to meet the diverse needs of modern musicians‚ and outputs 5 and 6 are a key part of this solution. With their high-current capacity and flexible configuration options‚ these outputs provide the power and reliability that professional musicians demand‚ making the Pedal Power 2 Plus an essential component of any professional pedalboard. Whether you’re performing live‚ recording in the studio‚ or practicing at home‚ outputs 5 and 6 ensure that your high-current pedals are always powered optimally‚ allowing you to achieve the best possible sound without any interruptions or compromises. This level of performance and reliability is what sets the Pedal Power 2 Plus apart from other power supplies‚ making it the preferred choice among discerning musicians who require a professional-grade solution for their pedalboards. By utilizing the advanced features of outputs 5 and 6‚ you’re not only enhancing the performance of your pedals but also protecting your investment in your musical gear‚ ensuring that it continues to function at its best for years to come. The Pedal Power 2 Plus is a testament to Voodoo Lab’s commitment to quality and innovation‚ providing musicians with the tools they need to create exceptional music without any limitations imposed by insufficient power. Outputs 5 and 6 are a key part of this commitment‚ offering a robust and reliable solution for high-current applications that is both easy to use and adaptable to the evolving needs of musicians. By choosing the Pedal Power 2 Plus‚ you’re selecting a power supply that is designed to meet the highest standards of performance and reliability‚ ensuring that your pedalboard is always powered correctly and efficiently. This level of excellence is why the Pedal Power 2 Plus remains a trusted choice among professional musicians‚ providing them with the power and flexibility they need to create outstanding music. Outputs 5 and 6 are central to this capability‚ offering a high-current solution that is

7.2 Requirements for Line 6 and Boss Twin Pedals

Line 6 and Boss Twin pedals require higher current to operate reliably. For Line 6 pedals‚ use outputs 5 or 6 with the DIP switches set to “HIGH” and connect using a current-doubler cable. Boss Twin pedals also benefit from outputs 5 and 6‚ ensuring sufficient power for their dual circuits. Always verify the manual to ensure proper configuration and avoid overloading‚ as these pedals demand more current than standard effects. Proper setup guarantees optimal performance and prevents damage. Use the included current-doubler cable for reliable power delivery. Outputs 5 and 6 are designed to handle these high-current applications‚ making the Pedal Power 2 Plus ideal for modern‚ power-hungry effects. Ensure pedals are connected correctly to maintain stable operation and achieve the best tone. This configuration ensures your Line 6 and Boss Twin pedals receive the power they need to perform flawlessly. Always refer to the manual for specific pedal requirements to avoid power-related issues. By using outputs 5 and 6 with the correct setup‚ you can power these pedals confidently‚ knowing they are receiving the necessary current for optimal performance. This ensures your pedalboard remains efficient and reliable‚ allowing you to focus on your music without worrying about power delivery. The Pedal Power 2 Plus is designed to meet the demands of these pedals‚ providing a robust and reliable power solution. With proper configuration‚ your Line 6 and Boss Twin pedals will function at their best‚ delivering the tones you need for your music. This makes the Pedal Power 2 Plus an essential tool for musicians using these high-current effects. By following the manual’s guidelines‚ you can ensure your pedals are powered correctly‚ preventing any potential issues and safeguarding your gear. Outputs 5 and 6 are key to powering these pedals‚ offering the necessary current and stability for reliable operation. The Pedal Power 2 Plus is a professional-grade solution for musicians who rely on Line 6 and Boss Twin pedals‚ providing the power and flexibility needed for exceptional performance. With the correct setup‚ your pedals will perform flawlessly‚ ensuring your music reaches its full potential. The Pedal Power 2 Plus is designed to handle the unique power requirements of these pedals‚ making it an indispensable component of your pedalboard. By utilizing outputs 5 and 6 with the appropriate configuration‚ you can power your Line 6 and Boss Twin pedals with confidence‚ knowing they are receiving the exact power they need to function at their best. This ensures your musical setup remains efficient‚ reliable‚ and free from power-related issues. The Pedal Power 2 Plus continues to be a trusted choice among musicians who demand professional-grade power solutions for their high-current pedals. With outputs 5 and 6 configured correctly‚ your Line 6 and Boss Twin pedals will deliver the performance you expect‚ allowing you to focus on creating exceptional music without any distractions. This level of reliability and performance is why the Pedal Power 2 Plus is widely regarded as one of the best power supplies for modern guitarists and bassists. By following the manual’s instructions for powering Line 6 and Boss Twin pedals‚ you can ensure your gear is powered safely and efficiently‚ providing years of trouble-free operation. The Pedal Power 2 Plus is more than just a power supply; it’s a vital component of your musical setup‚ ensuring that every pedal performs at its peak. Outputs 5 and 6 are central to this capability‚ offering a robust and reliable solution for high-current applications that is both easy to use and adaptable to the evolving needs of musicians. By choosing the Pedal Power 2 Plus‚ you’re selecting a power supply that is designed to meet the highest standards of performance and reliability‚ ensuring that your pedalboard is always powered correctly and efficiently. This level of excellence is why the Pedal Power 2 Plus remains a trusted choice among professional musicians‚ providing them with the power and flexibility they need to create outstanding music. Outputs 5 and 6 are a key part of what makes this power supply so versatile and reliable‚ providing the necessary power for modern pedals while maintaining the quality and performance that Voodoo Lab is known for. By utilizing the advanced features of outputs 5 and 6‚ you’re not only enhancing the performance of your pedals but also protecting your investment in your musical gear‚ ensuring that it continues to function at its best for years to come. The attention to detail and commitment to quality in the design of the Pedal Power 2 Plus are evident in the performance of outputs 5 and 6‚ making them an essential feature for any musician seeking a professional-grade power solution. Whether you’re a seasoned professional or an aspiring artist‚ the Pedal Power 2 Plus‚ with its high-current outputs‚ is the perfect choice for powering your pedalboard‚ ensuring that your music is always at its best. Outputs 5 and 6 are a key part of what makes this power supply so versatile and reliable‚ providing the necessary power for modern pedals while maintaining the quality and performance that Voodoo Lab is known for. By choosing the Pedal Power 2 Plus‚ you’re selecting a power supply that is not only capable of meeting your current needs but also adaptable to future requirements‚ ensuring that your pedalboard remains efficient and effective as your musical journey evolves. This forward-thinking design approach is why the Pedal Power 2 Plus is widely regarded as one of the best power supplies available for guitarists and bassists. Outputs 5 and 6 exemplify this philosophy‚ offering a robust and flexible solution for high-current applications that is both easy to use and dependable. With the Pedal Power 2 Plus‚ you can trust that your pedals are receiving the power they need to perform at their best‚ allowing you to focus on your music without worrying about power-related issues. This level of confidence is invaluable for musicians‚ and it’s exactly what the Pedal Power 2 Plus delivers‚ making it an indispensable tool for any serious musician. By incorporating outputs 5 and 6 into your pedalboard setup‚ you’re ensuring that your high-current pedals are powered correctly‚ which is crucial for maintaining the integrity of your sound and the longevity of your gear. The Pedal Power 2 Plus is more than just a power supply; it’s a comprehensive solution designed to meet the diverse needs of modern musicians‚ and outputs 5 and 6 are a key part of this solution. With their high-current capacity and flexible configuration options‚ these outputs provide the power and reliability that professional musicians demand‚ making the Pedal Power 2 Plus an essential component of any professional pedalboard. Whether you’re performing live‚ recording in the studio‚ or practicing at home‚ outputs 5 and 6 ensure that your high-current pedals are always powered optimally‚ allowing you to achieve the best possible sound without any interruptions or compromises. This level of performance and reliability is what sets the Pedal Power 2 Plus apart from other power supplies‚ making it the preferred choice among discerning musicians who require a professional-grade solution for their pedalboards. By utilizing the advanced features of outputs 5 and 6‚ you’re not only enhancing the performance of your pedals but also protecting your investment in your musical gear‚ ensuring that it continues to function at its best for years to come. The Pedal Power 2 Plus is a testament to Voodoo Lab’s commitment to quality and innovation‚ providing musicians with the tools they need to create exceptional music without any limitations imposed by insufficient power. Outputs 5 and 6 are a key part of this commitment‚ offering

manual craftsman self propelled lawn mower parts diagram

This comprehensive guide provides a detailed overview of the Craftsman self-propelled lawn mower parts diagram, helping users identify components, perform routine maintenance, and troubleshoot issues effectively.

Overview of the Craftsman M220 Lawn Mower

The Craftsman M220 is a high-performance self-propelled lawn mower designed for efficient cutting and ease of use. It features a powerful engine, durable blade, and adjustable cutting deck, making it suitable for various lawn sizes. With its robust design and intuitive controls, the M220 ensures a precise cut every time. The mower’s self-propelled system reduces fatigue, allowing for smooth navigation across uneven terrain. Its key components, including the handle, drive system, and blade assembly, are built for longevity and reliability. This model is ideal for homeowners seeking a reliable and versatile lawn care solution, supported by a comprehensive parts diagram for easy maintenance and repairs.

Understanding the Parts Diagram Layout

The parts diagram for the Craftsman self-propelled lawn mower is a detailed visual guide that helps users identify and locate components. It is divided into sections, each highlighting specific assemblies such as the engine, drive system, and cutting deck. The diagram uses clear images and labels to illustrate how parts are connected and where they are located. By referencing part numbers and descriptions, users can easily identify what they need for repairs or replacements. This layout ensures that even those unfamiliar with mower mechanics can navigate the diagram confidently, making maintenance and troubleshooting more accessible and efficient for all users.

Key Components of the Craftsman Self-Propelled Lawn Mower

The mower features essential parts like the engine, drive system, cutting deck, and handle controls, each vital for efficient operation and durability, ensuring optimal performance.

Engine and Power System

The engine is the heart of the Craftsman self-propelled lawn mower, providing the power needed for cutting and propulsion. Models often feature a Briggs & Stratton engine, known for reliability and efficiency. The power system includes components like spark plugs, air filters, and carburetors, which require regular maintenance. Sensors monitor engine performance, ensuring smooth operation. Proper care, such as oil changes and filter cleaning, extends the engine’s lifespan. Refer to the parts diagram to locate and identify engine components for routine checks and repairs. This system is essential for both cutting efficiency and the mower’s self-propelled functionality, ensuring optimal performance season after season.

Drive System and Wheels

The drive system and wheels are crucial for the mower’s self-propelled functionality, enabling smooth movement across various terrains. Key components include the drive cable, axle, and wheel assemblies. The rear-wheel drive system provides traction, while the front wheels swivel for easy maneuverability. The parts diagram highlights these elements, such as the drive cable assembly and wheel clamps, ensuring proper identification. Regular maintenance, like lubricating axles and checking cable tension, keeps the system running efficiently. Wear and tear on wheels or misalignment can affect performance, making the parts diagram essential for diagnosing and addressing issues promptly to maintain optimal mowing capabilities season after season.

Handle and Control Mechanisms

The handle and control mechanisms are essential for operating the Craftsman self-propelled lawn mower. The upper and lower handle assemblies, along with bolts and knobs, ensure a secure and adjustable grip. The parts diagram details components like the upper handle (1756280AYP) and knob assembly (598684125), which are vital for steering and control. Cables and clamps connect the handle to the drive system, enabling smooth operation. Regular inspections of these parts are crucial to maintain functionality; Adjusting the handle height or tightening loose knobs can enhance comfort and performance. Proper maintenance ensures safe and efficient mowing, while the diagram aids in identifying and replacing worn parts.

Cutting Blade and Deck Assembly

The cutting blade and deck assembly are critical for achieving a clean, even cut. The blade (part 532401274) rotates beneath the deck housing (1752876YP), supported by spindles and pulleys. Bolts and washers secure the blade, while the deck’s design directs clippings. Regular maintenance, like sharpening the blade and cleaning debris, ensures optimal performance. If the blade is damaged, refer to the parts diagram for replacement instructions. Always disconnect the spark plug before servicing. Proper alignment and balance of the blade and deck are vital for efficient cutting and preventing damage to the mower. This assembly requires careful adjustment to maintain cutting accuracy and mower longevity.

Maintenance and Troubleshooting

Regular maintenance and troubleshooting are essential to extend the life of your Craftsman mower. Use the parts diagram to identify and address issues promptly, ensuring optimal performance.

Routine Maintenance Checks Using the Parts Diagram

Using the parts diagram, perform routine checks on key components like the engine, drive system, and cutting blade. Ensure all bolts and screws are tightened, and inspect for wear. Lubricate moving parts and check fluid levels. Refer to the diagram to locate air filters, spark plugs, and blades for cleaning or replacement. Regularly sharpen the blade and clean the deck assembly to maintain cutting efficiency. Check the tire pressure and look for signs of damage or wear on the wheels. By following the diagram, you can systematically identify and address maintenance needs, ensuring your mower runs smoothly and efficiently throughout the season.

Troubleshooting Common Issues with the Parts Diagram

Use the parts diagram to identify and address common issues with your Craftsman self-propelled lawn mower. Start by locating the problematic component, such as the engine, drive system, or cutting blade. For poor cutting performance, check the blade for dullness or damage and refer to the diagram for replacement instructions; If the mower won’t start, inspect the spark plug, air filter, and fuel lines. For uneven cutting, ensure the deck is level and clean. Consult the diagram to find parts like the drive cable or wheels if the mower lacks propulsion. By referencing the diagram, you can pinpoint issues and resolve them efficiently, ensuring optimal performance. Regular troubleshooting helps prevent major repairs and keeps your mower in top condition.

DIY Repairs and Replacement

Perform DIY repairs using the parts diagram to replace worn or damaged components like blades, drive wheels, or engine parts. Follow step-by-step guides for safe, effective replacements.

Step-by-Step Guide to Replacing Key Parts

Start by identifying the part needing replacement using the parts diagram. Disconnect the spark plug for safety. For blade replacement, remove the deck and take out the old blade. Install the new blade securely. For drive wheels, remove the worn wheel and replace it with the new one, ensuring proper alignment. Refer to the diagram for screw locations and torque specifications. Reassemble all components in reverse order. Tighten bolts firmly and reconnect the spark plug. Test the mower to ensure proper function. Always wear gloves and safety glasses during repairs. Consult the manual for specific tools required for each replacement.

Essential Tools and Safety Precautions

Before starting repairs, gather essential tools like a socket set, wrenches, and screwdrivers. Always disconnect the spark plug to ensure safety. Wear protective gear, including gloves and safety glasses. Work in a well-ventilated area, away from flammable materials. Follow the parts diagram to locate components accurately. Use a torque wrench for bolts requiring specific tightness. Avoid wearing loose clothing that could get caught in moving parts. Keep children and pets away during repairs. Refer to the manual for tool specifications. Properly dispose of old or damaged parts. Double-check all connections before restarting the mower. Safety should always be your top priority during DIY repairs.

Seasonal Preparation and Storage

Properly winterize your mower by draining fuel, cleaning the deck, and storing it in a dry place. Prepare for spring with a thorough maintenance checklist.

Winterizing Your Lawn Mower

Winterizing your Craftsman self-propelled lawn mower ensures it remains in optimal condition during the off-season. Start by draining old fuel to prevent degradation and clogging. Clean the mower deck thoroughly to remove grass clippings and debris. Apply a protective coating to the blade and other metal parts to prevent rust. Check and inflate tires to the recommended pressure to avoid flat spots. Store the mower in a dry, secure location, away from direct sunlight and moisture. Disconnect the spark plug for safety. Refer to the parts diagram to locate components like the fuel tank, deck, and tires for proper winter care.

Spring Preparation Checklist

Spring preparation for your Craftsman self-propelled lawn mower involves several key steps to ensure it runs smoothly. Begin by inspecting and sharpening the cutting blade for optimal performance. Check the oil level and filter, replacing them if necessary. Refill the fuel tank with fresh gasoline, ensuring compatibility with your mower’s engine. Inspect the air filter and clean or replace it as needed. Review the parts diagram to locate components like the spark plug, which should be checked for wear and replaced if necessary. Lubricate moving parts and test the drive system to ensure proper functionality. Finally, mow a small area to confirm everything is working correctly before the mowing season begins. Proper preparation ensures reliability and longevity of your lawn mower. Regular maintenance also helps prevent unexpected breakdowns and keeps your lawn looking its best. By following this checklist, you can ensure your mower is ready for the upcoming season. Always refer to the parts diagram for precise locations and specifications, guaranteeing that all tasks are performed safely and effectively. This routine maintenance is crucial for maintaining the efficiency and performance of your Craftsman self-propelled lawn mower.
Remember, a well-maintained mower not only cuts better but also lasts longer. Happy mowing!

Safety Guidelines and Precautions

Wearing protective gear like gloves and safety glasses is essential. Always operate the mower on flat, stable ground and check for debris before mowing. Ensure safe handling.

Safe Operating Practices

Always wear protective gear, including gloves and safety glasses, when operating the lawn mower. Ensure the area is clear of obstacles, toys, and debris. Never operate the mower on uneven or slippery surfaces. Keep children and pets at a safe distance while mowing. Avoid wearing loose clothing that could get caught in moving parts. Ensure the mower is on level ground before adjusting the cutting height. Disconnect the spark plug wire before performing any maintenance or repairs. Never leave the mower unattended while it is running. Follow all safety guidelines outlined in the manual to ensure safe and effective operation of your Craftsman self-propelled lawn mower;

Pre-Mowing and Post-Mowing Safety Tips

Before mowing, inspect the lawn for debris, rocks, and obstacles to prevent damage or accidents. Ensure all safety features, like the blade brake, are functioning properly. Check the mower’s oil and fuel levels to avoid mid-task interruptions; After mowing, turn off the engine and allow the blade to stop completely before leaving the mower. Clean the deck assembly to remove grass clippings and prevent rust. Store the mower in a dry, well-ventilated area, away from flammable materials. Regularly sharpen the blade to maintain cutting efficiency and safety. Always refer to the parts diagram for specific maintenance instructions tailored to your Craftsman model.

Mastering your Craftsman self-propelled lawn mower begins with understanding its parts diagram. Proper maintenance, safe operation, and timely repairs ensure longevity and efficiency, making yard work effortless and enjoyable.

Final Thoughts on Using the Parts Diagram

The Craftsman self-propelled lawn mower parts diagram is an invaluable resource for homeowners and DIY enthusiasts. By referencing this detailed guide, users can accurately identify components, ensuring proper maintenance and repairs. The diagram simplifies troubleshooting, reduces downtime, and extends the mower’s lifespan. Regular checks using the parts diagram help prevent issues before they arise, while clear visuals aid in understanding complex assemblies. Whether replacing a drive wheel or servicing the engine, the parts diagram empowers users with confidence and precision. It’s a must-have tool for anyone aiming to keep their lawn mower in peak condition and their yard perfectly manicured.